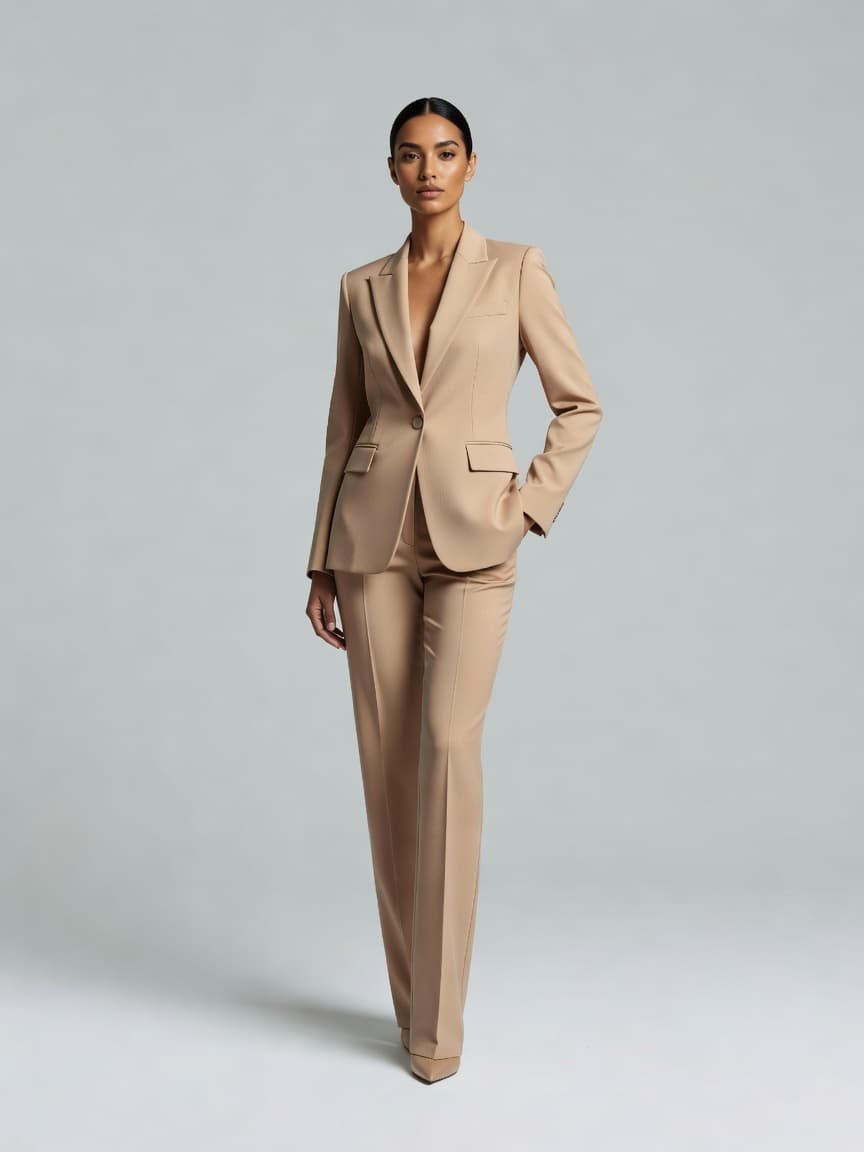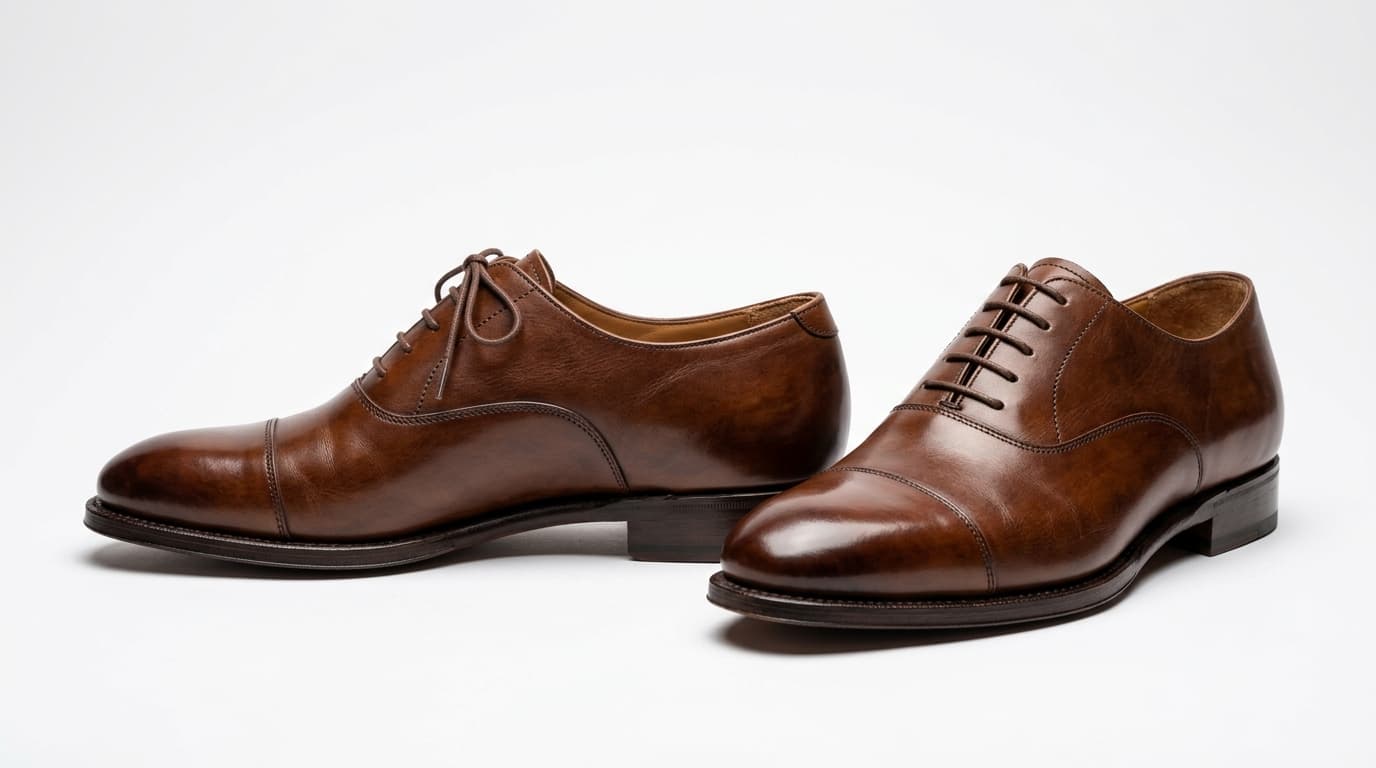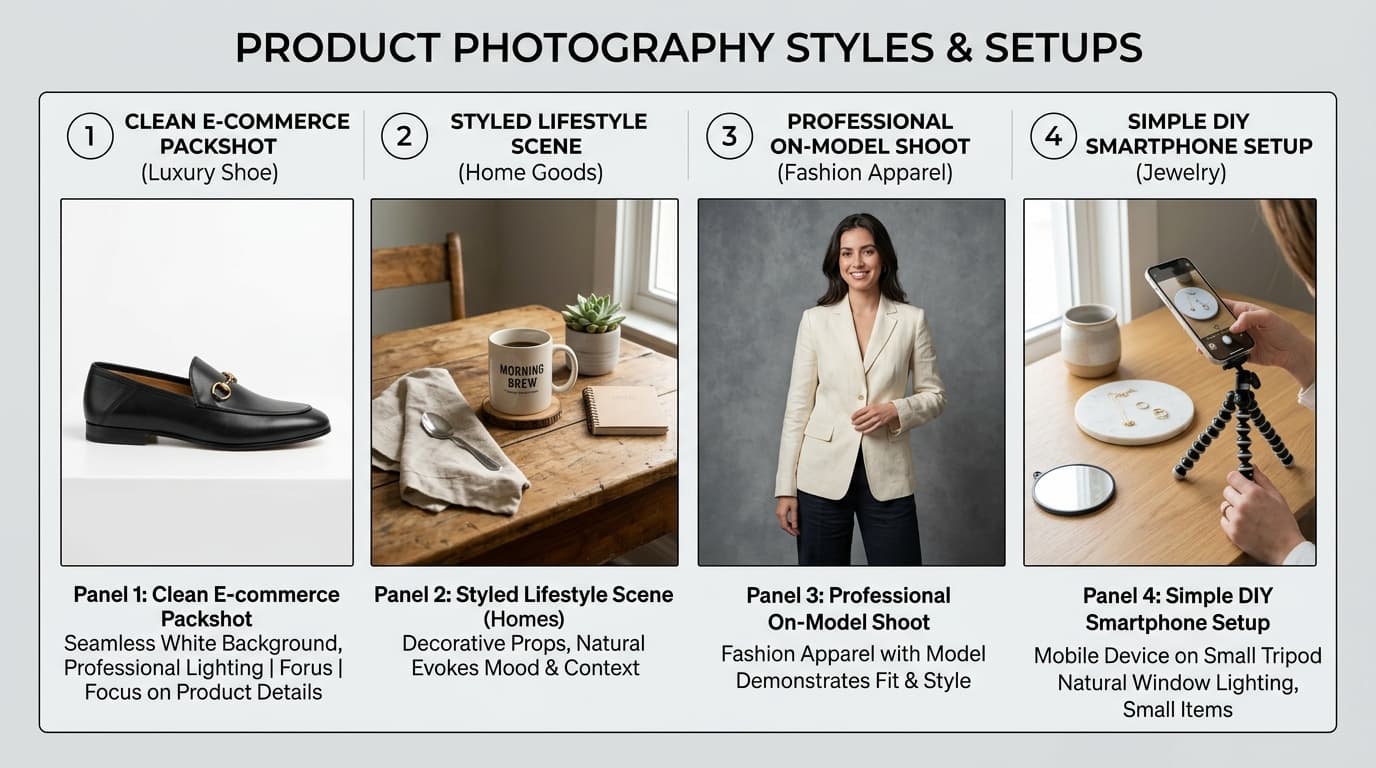
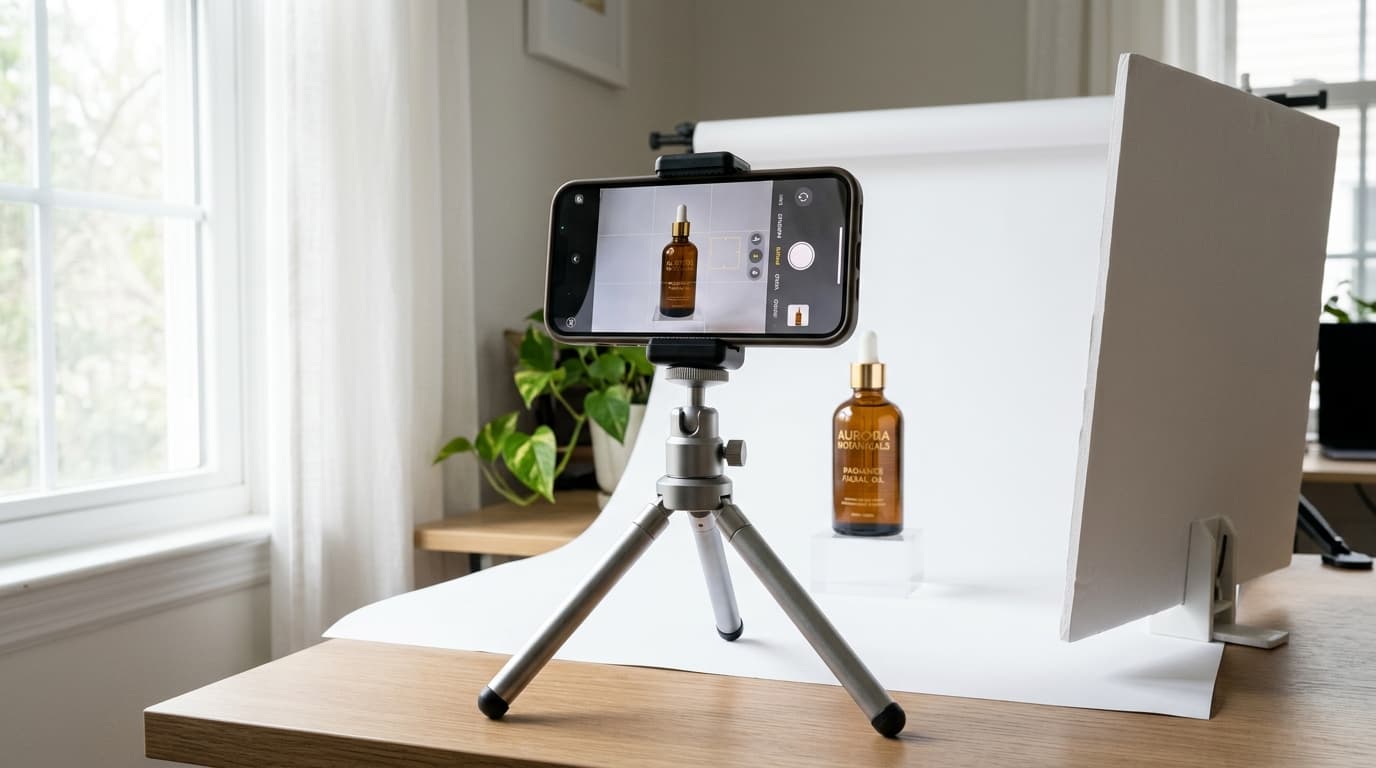
The Smartphone Catalog Rule: You do not need a four-figure camera setup to build an ecommerce store. An iPhone, a steady tripod mount, controlled diffused lighting, and a standardized shot list can produce clean, commercial-ready product packshots. The challenge is never taking one lucky photo—it is maintaining uniform perspective, color accuracy, and framing across dozens of catalog SKUs.
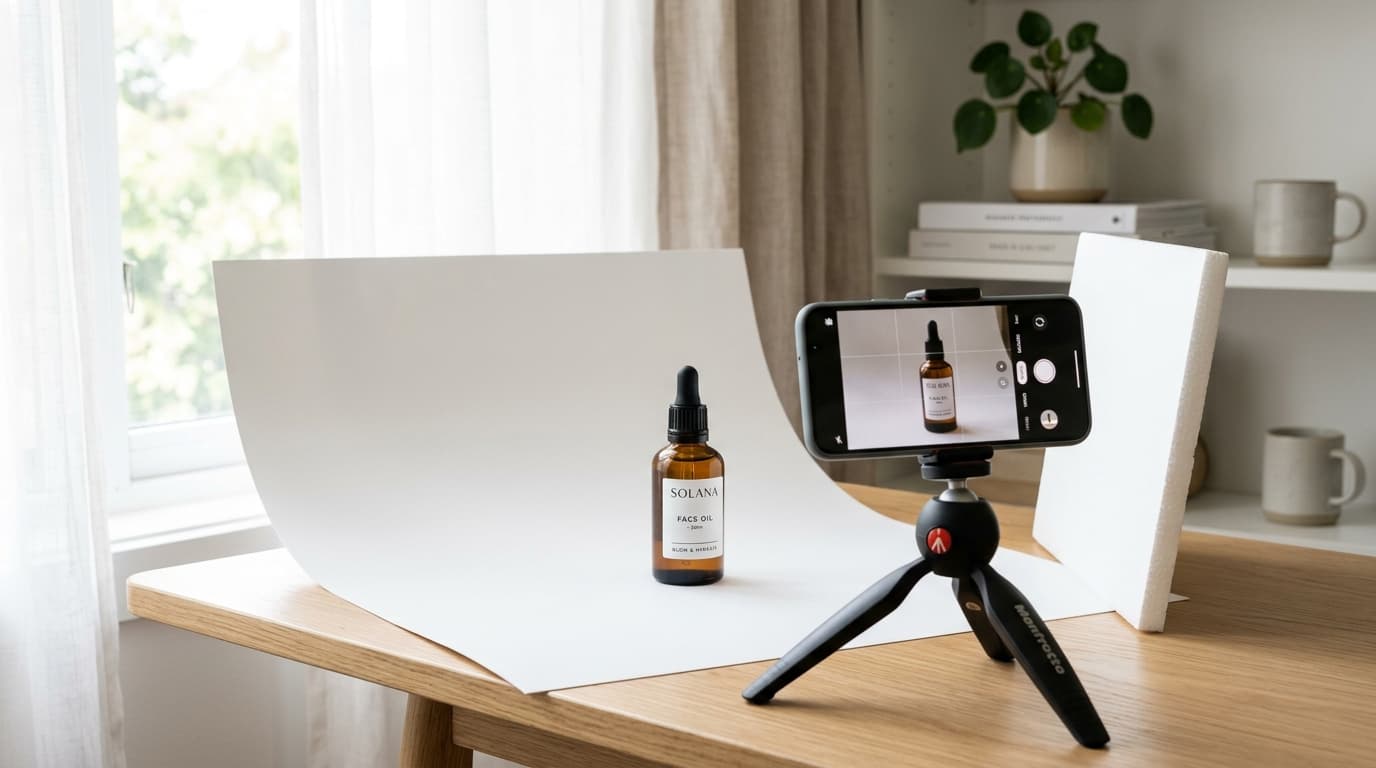
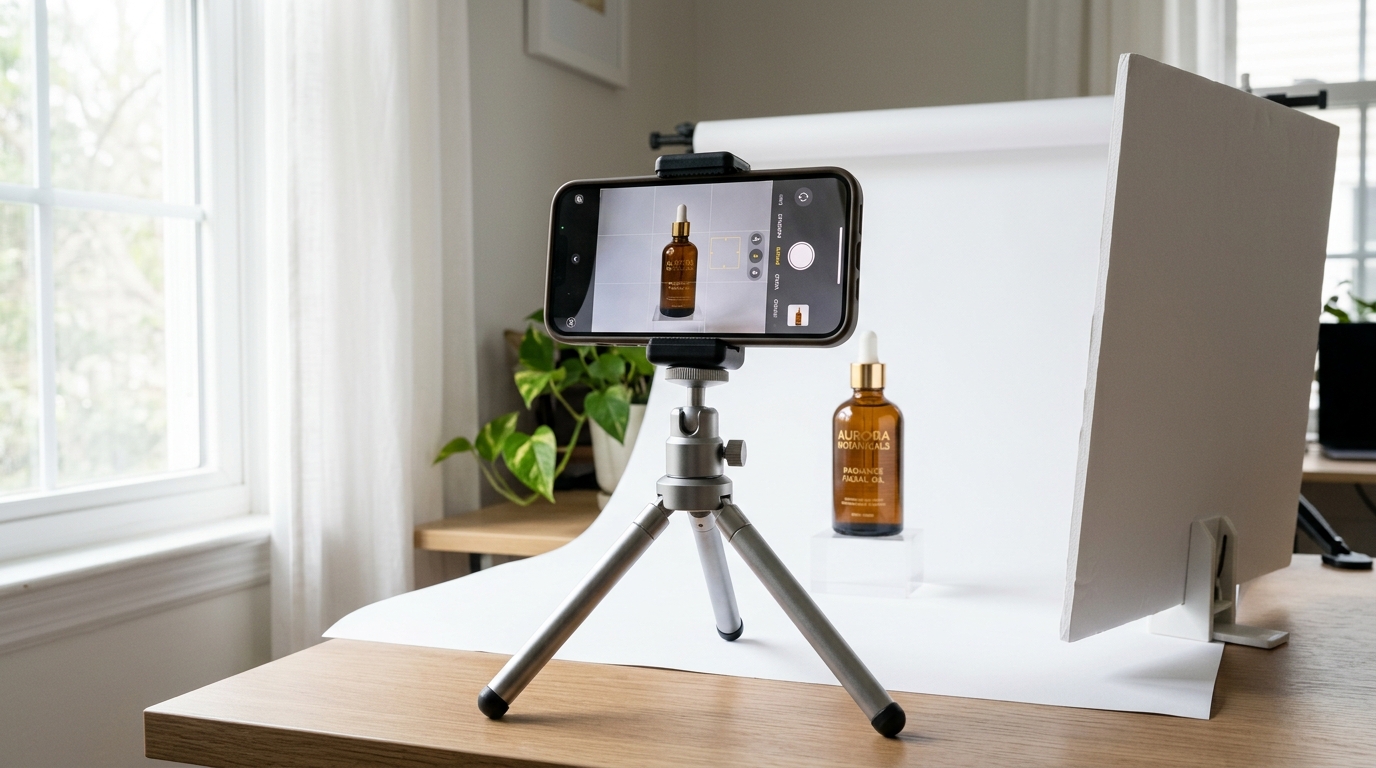 Product photography using iPhone mounted on a tripod with seamless white background sweep and diffused window light
You do not need a dedicated mirrorless camera to start photographing products for an online store. An iPhone, a stable support, controlled lighting, and a consistent process can produce useful product images for many ecommerce businesses.
The difficulty is not simply taking one good photograph. It is producing a collection in which every product has similar framing, believable colors, clear details, and a background that looks consistent across the store.
The key to product photography using iPhone is to standardize the workflow before photographing the whole catalog. This guide shows you how to prepare a simple shooting station, choose useful camera settings, photograph a complete set of angles, and check the images before uploading them.
The Equipment You Need
Start with a simple setup. You can refine it later after identifying a specific limitation.
You will need:
- An iPhone with a clean rear camera lens: Modern iPhone models capture sharp optical details when lighting is sufficient.
- A stable phone holder or tabletop tripod: Prevents micro-shakes and locks the perspective between shots.
- A clean table or shooting surface: A level desk or tabletop in an area with controllable ambient light.
- A plain background sweep: Seamless white craft paper, poster board, or neutral vinyl.
- A window with indirect light or a daylight LED softbox: Consistent illumination reveals shape and texture without harsh hotspots.
- A white bounce card: A $4 piece of foam core board to reflect light into darker shadow sides.
- A microfiber cloth: Dedicated cleaning cloth for both the product surfaces and the iPhone camera lenses.
You do not need to purchase every photography accessory at once. First, learn to control light, framing, focus, and exposure with the equipment you already have.
(For a broader overview of building an inexpensive home shooting station, see Shotinger's DIY product photography setup for beginners.)
Step 1: Prepare the Product and the iPhone
Photography issues often begin before you take the first shot. A small smudge on a smartphone lens or dust on a product label can ruin an entire batch.
- Clean the camera lenses: Wipe the rear camera lenses gently with a clean microfiber cloth. A fingerprint smudge causes light flaring, reduced contrast, and cloudy haze across the frame.
- Prep the product: Wipe away dust, smudges, and fingerprints. Straighten labels, align caps or closures, and make sure that any retail packaging is crisp and dent-free.
- Turn on the Camera Grid: Go to Settings > Camera and toggle Grid ON. The 3x3 overlay lines help you keep product edges straight, center your composition, and avoid tilted horizon lines.
- Use the rear camera exclusively: The front selfie camera has a smaller sensor and lower resolution. Always use the primary rear camera array.
- Check battery and storage: Ensure your iPhone has ample storage and battery life so you are not interrupted midway through a multi-angle shooting session.
Step 2: Choose a Useful Camera View
For standard product photography, begin with the main camera at its standard 1x view rather than the ultra-wide lens (0.5x).
The ultra-wide lens exaggerates perspective when you photograph an object from close range. A bottle, box, shoe, or jar will look bulbous and distorted, with edges bowing outward unnaturally.
- Step back to frame: Move the phone back physically rather than pinching to zoom digitally. Digital zoom crops the sensor and reduces image resolution and clarity.
- Use optical telephoto lenses when available: If your iPhone features a dedicated 2x or 3x telephoto camera, test it on your product. Telephoto compression flattens perspective, keeping product proportions true to life.
- Lock the focal distance: Once you have found a pleasing camera distance, maintain that distance and tripod height across all similar products in the category.
Step 3: Set Focus and Exposure Before Shooting
The iPhone automatically adjusts focus and brightness dynamically, which is ideal for casual snapshots. However, for an ecommerce catalog, those automatic adjustments cause subtle shifts in brightness and white balance between photos.
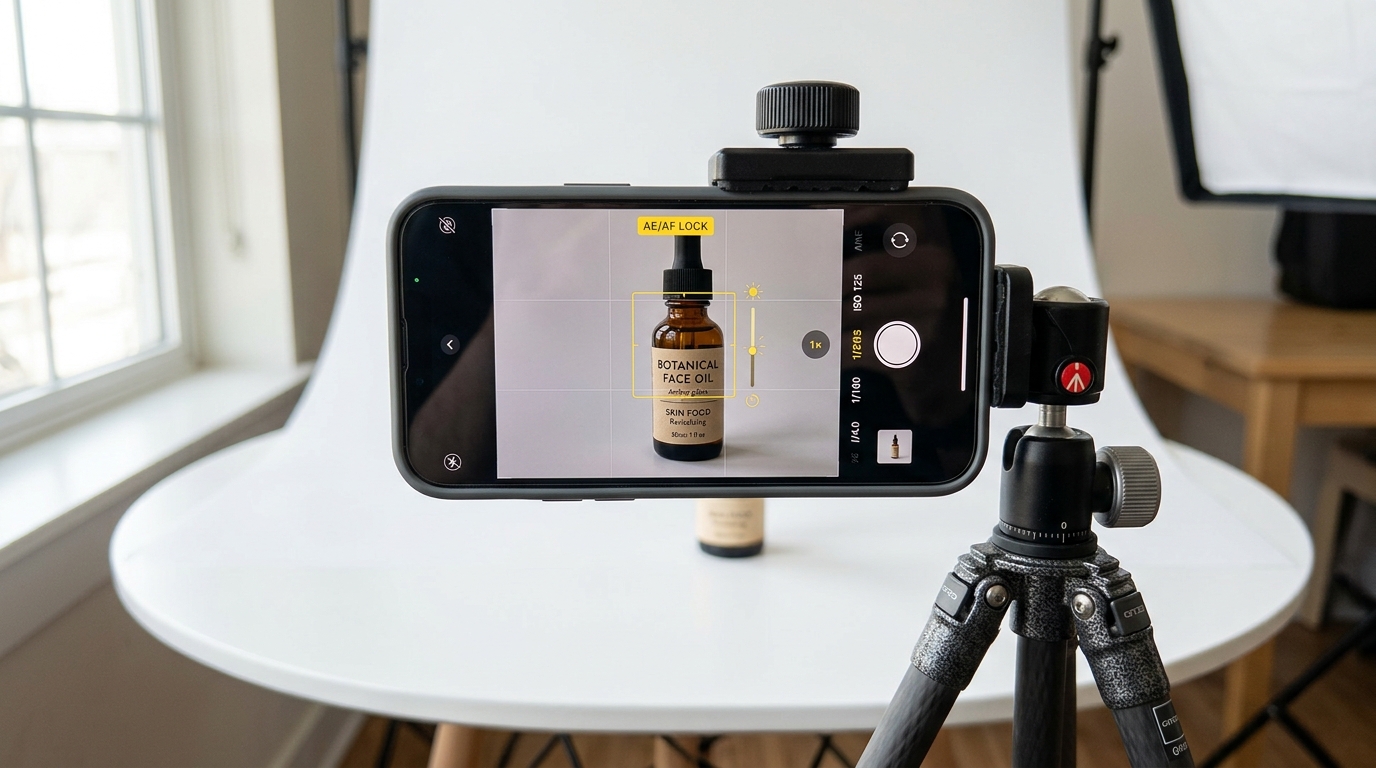 Close-up of iPhone screen on tripod showing AE/AF lock in yellow and exposure slider adjustment
Lock Focus and Exposure (AE/AF Lock)
To prevent the iPhone from recalculating lighting when you swap products or move your hands into the frame:
- Tap and hold the most critical part of the product (such as the brand label or center detail) until the yellow AE/AF LOCK banner appears at the top of the screen.
- A yellow focus box with a small sun icon will appear. Slide your finger up or down beside the box to dial in the exposure until highlights are clean and shadows retain detail.
- Review Apple's official guide on adjusting focus and exposure on iPhone for model-specific nuances.
After taking a test shot, zoom in to inspect the label typography, product edges, and color accuracy. Locking focus and exposure prevents unintended variations, but you should re-evaluate exposure whenever switching to a significantly darker or lighter product.
Choose a Resolution That Suits the Final Image
Capture your photos in the highest resolution supported by your iPhone model (such as 24MP or 48MP on newer Pro models). High-resolution files give you flexibility to crop into fine details for desktop zoom views without losing image sharpness.
Review Apple's advanced iPhone camera settings guide for format options like Apple ProRAW and High Efficiency vs. Most Compatible formats.
Step 4: Build a Repeatable Lighting Setup
Lighting is the single most decisive factor affecting product image quality on a smartphone sensor. Harsh direct light causes blown highlights and deep black shadows, while fluctuating ambient light causes inconsistent colors across your catalog.
- Position beside indirect light: Place your tabletop setup 3 to 5 feet beside a large window that receives bright, indirect sky light. Window light coming from a 45-to-90 degree side angle reveals three-dimensional shape, embossing, and material textures.
- Add a white reflector: Place a white foam core board on the side opposite the window. This bounces soft fill light back into shadow areas, brightening the unlit side of the product without requiring a second lamp.
- Diffuse direct sunlight: If harsh sunlight beams through the window, soften it with a sheer white curtain or tape parchment paper across the window glass.
- Avoid mixed color temperatures: Turn off overhead ceiling lights and ambient household lamps (typically warm 2700K yellow). Mixing warm household lamps with cool natural daylight (5500K) produces unnatural color casts that are difficult to correct in post-production.
How to Photograph a Product Against a White Background
A seamless curved sheet of white poster board or craft paper creates an infinity sweep without a distracting horizontal corner line behind the item.
Take a test shot and inspect both the background and the product:
- If the background looks dull gray, do not simply raise the iPhone exposure slider until the entire screen is blindingly bright—doing so will blow out label details and wash out light-colored products.
- Instead, bring your light source closer to the backdrop or adjust your bounce reflector. The objective is a clean, bright background with the product edges crisply defined.
(For detailed lighting setups and hardware recommendations, see our product photography lighting guide.)
Step 5: Fix the Camera Position Before Photographing a Batch
Handholding your phone creates subtle angle variations from shot to shot. Using a dedicated smartphone clamp on a tabletop tripod ensures rigid consistency:
- Set eye-level camera height: Align the iPhone lens roughly level with the middle of the product, tilted downward only slightly (about 5 to 10 degrees).
- Align with the grid: Use the iPhone camera grid to ensure vertical bottle or box lines run parallel to the vertical grid lines.
- Mark the floor and table: Use small pieces of painter's tape on your table surface to outline the tripod legs and the product base.
- Swap without moving the phone: When photographing the next SKU, place it directly on the tape outline. This maintains uniform scale and position across your entire catalog.
Step 6: Photograph a Complete Set of Product Angles
A single front shot rarely answers every question a buyer has before purchasing. Standardizing a 6-image shot list provides comprehensive customer reassurance while keeping your shooting sessions disciplined and fast.
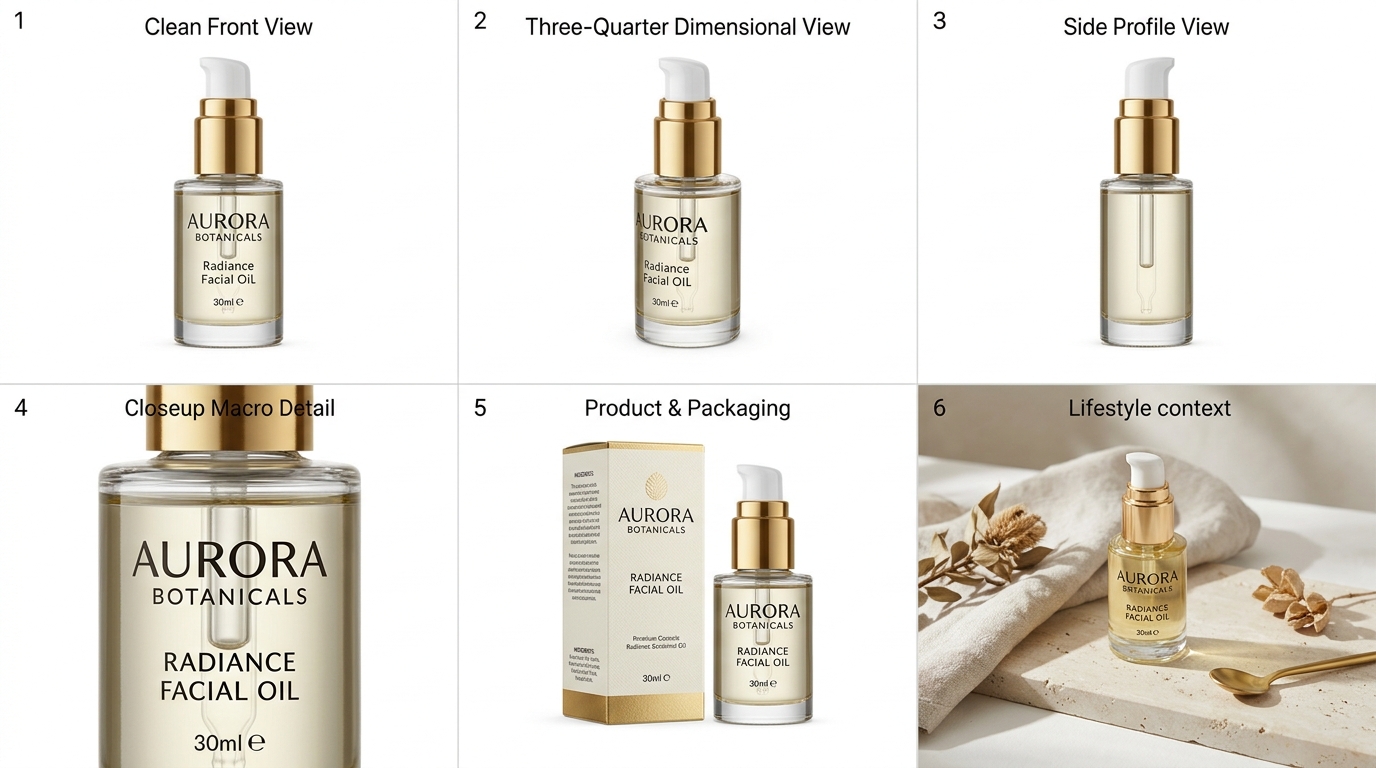 6-panel grid showing complete ecommerce product photography shot list: front, 3/4, side, macro, packaging, and lifestyle
| Shot Type | Role in the Listing | Key Visual Focus |
|---|---|---|
| 1. Front View | Hero listing thumbnail | Primary brand name, logo, label typography, and symmetry |
| 2. Three-Quarter View | Depth and volume | Dimensional depth, cap/lid profile, shoulder contours |
| 3. Side Profile View | Secondary construction | Product thickness, side profile, pump or dispenser mechanism |
| 4. Macro Detail | Perceived craftsmanship | Fine ingredients, embossed lettering, tactile surface texture |
| 5. Product & Packaging | Complete customer purchase | Retail box, bundled accessories, applicator, or protective case |
| 6. Contextual Lifestyle | Scale and real-world setting | Product in an aesthetic home setting, showing scale and usage |
Capture the entire planned shot sequence for an item before adjusting your lighting or camera setup. This guarantees that all views of a single product share identical color temperature and exposure.
(For specialized multi-angle workflows in other categories, see our guides on Shoe Product Photography System and How to Photograph Jewelry Without a Macro Lens.)
Step 7: Create a Mini Production Workflow for Multiple Products
The difference between photographing one item and photographing an entire store catalog is repeatability.
Adopt this structured batch production sequence:
[ 1. Prepare ] → Clean lenses, wipe products, tape position marks
      ↓
[ 2. Capture ] → Lock AE/AF, photograph full 6-shot sequence per SKU
      ↓
[ 3. Review  ] → Inspect sharpness, reflections, and labels at 100% zoom
      ↓
[ 4. Select  ] → Pick the sharpest single frame per angle; delete extras
      ↓
[ 5. Edit    ] → Batch apply consistent cropping, exposure, and color balance
      ↓
[ 6. Organize] → Rename files by SKU and angle for instant upload
- Inspect in batches: Do not shoot 50 items before reviewing your photos on a computer screen. Inspect the first product thoroughly. Catching a crooked label, blurry focus, or gray background on item #1 saves hours of re-shoots later.
- Systematic file naming: Rename files with structured names (e.g.,
SKU101-front.jpg,SKU101-angle.jpg) as soon as you transfer them from your iPhone.
Step 8: Edit for Accuracy and Consistency
Ecommerce photo editing should correct capture limitations, not alter what the customer will receive in the mail. Misleading edits increase customer returns.
- Straighten and center: Use the native iOS Photos app or Adobe Lightroom Mobile to ensure verticals are plum and the product sits centered in the frame.
- Crop uniformly: Apply the same aspect ratio (1:1 square for Instagram/Shopify, or 4:5 / 3:4 portrait) across all listings.
- Tune white balance: Adjust temperature so whites are clean neutral white, neither cool blue nor muddy orange.
- Avoid aggressive saturation or clarity: Pushing contrast or saturation too far makes colors look artificial and can cause halo artifacts along product edges.
- Protect white items on white backdrops: When shooting white products, do not push exposure so high that the product edges dissolve into the background sweep.
Step 9: Export Images for Your Sales Channels
Before uploading to Shopify, Amazon, or WooCommerce, verify the destination channel's specifications:
- Format: Use high-quality WebP or JPEG for fast page loading times.
- Resolution: A canvas of 2000 x 2000 pixels or 2400 x 2400 pixels is ideal—sharp enough to trigger desktop zoom features without slowing down mobile browsing.
- File size: Aim for file sizes between 300KB and 800KB. Compress large files before uploading to preserve fast mobile performance.
- Retain original source files: Always keep uncompressed original captures in a backup folder in case you need to re-crop or re-export for a new marketplace requirement later.
Step 10: Know When the iPhone Needs Support
While an iPhone produces stellar tabletop packshots, certain advanced creative tasks demand additional tools:
- Microscopic engravings: Tiny jewelry hallmarks and micro-faceted gemstones may require dedicated macro optics.
- Curved chrome and mirrors: Complex 360-degree reflective surfaces require specialized studio flags and light tents.
- Multiple on-model and editorial scenes: Booking models, hiring stylists, and renting physical locations for every product drop can quickly become cost-prohibitive.
Once you have captured a clean, accurate packshot on your iPhone, you do not need to build elaborate physical sets for marketing banners, lifestyle ads, and social campaigns.
With Shotinger Product Studio, you can take your clean iPhone packshot and instantly generate photorealistic studio plinths, lifestyle room settings, and contextual editorial scenes while preserving exact product geometry and branding.
Common iPhone Product Photography Problems & Fixes
| Problem | Root Cause | Practical Solution |
|---|---|---|
| Image looks soft or hazy | Fingerprint grease on rear lens or slight hand tremor | Clean lens with microfiber; lock phone into a sturdy tripod clamp. |
| Product looks distorted / bulbous | Camera placed too close using ultra-wide lens | Step back; use standard 1x or 2x telephoto lens from 3–4 feet away. |
| Background brightness fluctuates | iPhone auto-exposure resetting between shots | Tap and hold product to lock AE/AF Lock; adjust exposure slider manually. |
| Label text is obscured by glare | Light source reflecting directly into camera lens | Rotate product slightly or move key light 15 degrees off-axis. |
| Product colors shift between photos | Mixed light sources (window daylight + warm ceiling lamp) | Turn off household interior lights; shoot under pure daylight or 5500K LEDs. |
| Product sizes look inconsistent in store | Tripod distance shifted between products | Mark tripod legs and product base with blue painter's tape on table. |
| Editing takes too long per photo | Inconsistent capture settings requiring individual fixes | Standardize lighting, exposure, and framing at the moment of capture. |
Frequently Asked Questions
Is an iPhone good enough for ecommerce product photography?
Yes. Modern iPhones feature advanced sensors and high optical resolution that are more than capable of capturing commercial-grade ecommerce imagery. High-quality product photos depend far more on diffused lighting, camera stability, clean backgrounds, and repeatable framing than on owning an expensive DSLR body.
Which iPhone lens should I use for product photography?
Use the primary 1x wide camera or the 2x / 3x telephoto optical lens. Avoid the 0.5x ultra-wide lens for tabletop products because its optical perspective stretches corners and causes barrel distortion, making bottles, shoes, and boxes appear warped.
How do I get a pure white background with an iPhone?
Create a seamless sweep using a curved sheet of matte white poster board. Position your primary light to illuminate the product and background evenly, and use a white bounce board to soften shadows. Lock AE/AF and adjust the exposure slider until the backdrop is clean, ensuring you do not overexpose white product edges.
Should I use Portrait mode for product photography?
No. Portrait mode applies computational depth-of-field blur designed for human faces. On physical products, it frequently blurs genuine product edges, caps, and label corners, creating an artificial, unconvincing look. Use regular Photo mode with AE/AF Lock.
What is the best app to edit iPhone product photos?
The built-in Apple Photos app is excellent for basic straightening, cropping, and exposure adjustments. For batch processing multiple product listings with uniform color profiles, free mobile apps like Adobe Lightroom Mobile or Snapseed offer advanced curve and color control.
Final Thoughts
Product photography using an iPhone becomes simple and rewarding once you treat it as a disciplined production system rather than a series of disconnected snapshots.
Start by wiping your camera lens, mounting the phone securely on a tripod, locking AE/AF exposure, and maintaining consistent lighting with a window and bounce card. Work through your 6-image shot list systematically, review the results on a large screen, and batch edit for fidelity.
Once your foundational packshots are clean and consistent, you can easily expand your marketing creative across studio plinths, on-model lifestyle scenes, and ad campaigns.
Ready to turn your iPhone packshots into high-converting lifestyle campaigns?
Generate realistic commercial studio and lifestyle imagery from your clean smartphone product photos in seconds.
Explore Shotinger Product Studio →
Start creating campaign-ready product visuals
Transform flat lays, packshots, and jewelry photos into photorealistic on-model imagery in under 60 seconds.