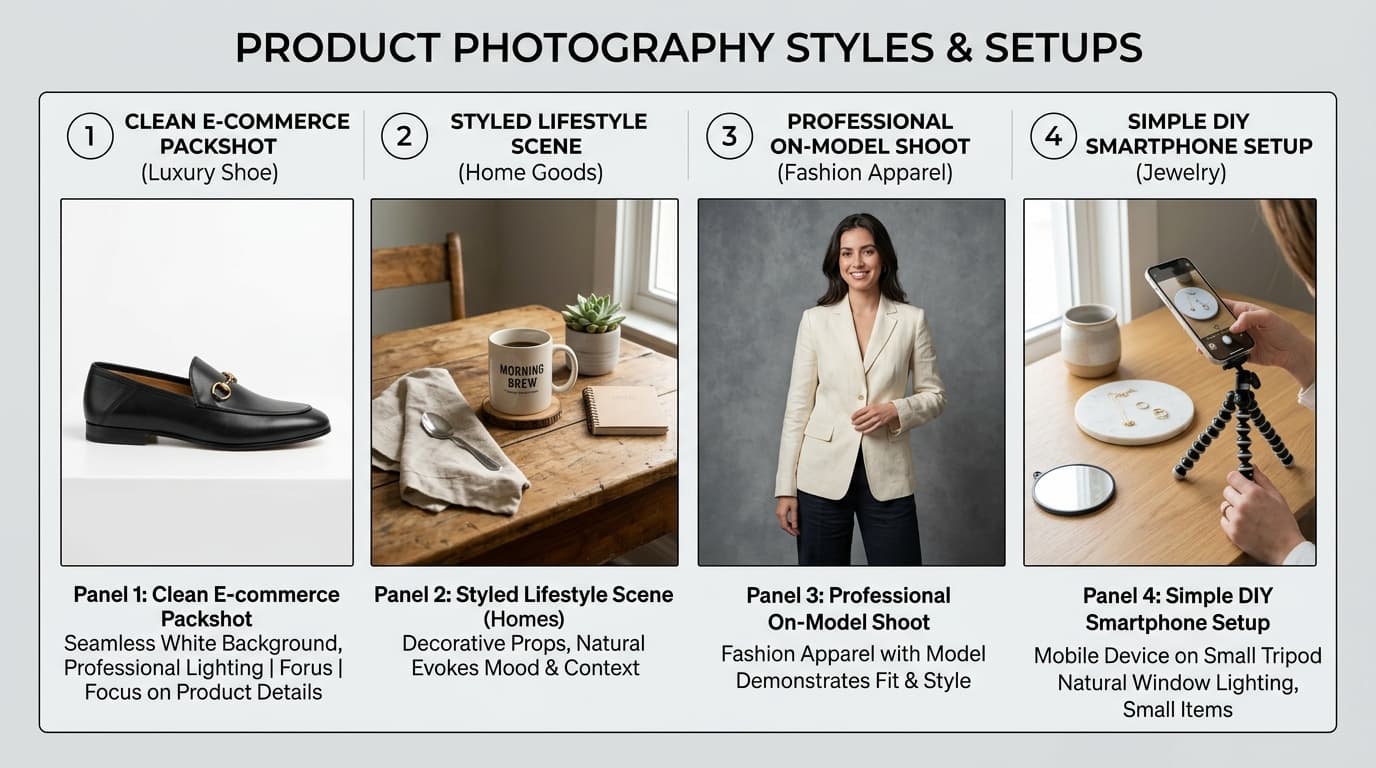
The Beginner Setup: A smartphone or camera, a sturdy table, a simple white or neutral backdrop sweep, one good light source, a white foam card for bounce fill, and a mini tripod or stable phone stand. The goal is not to construct an expensive commercial studio overnight—it is to create a repeatable setup that gives every product in your catalog a clean, uniform presentation.
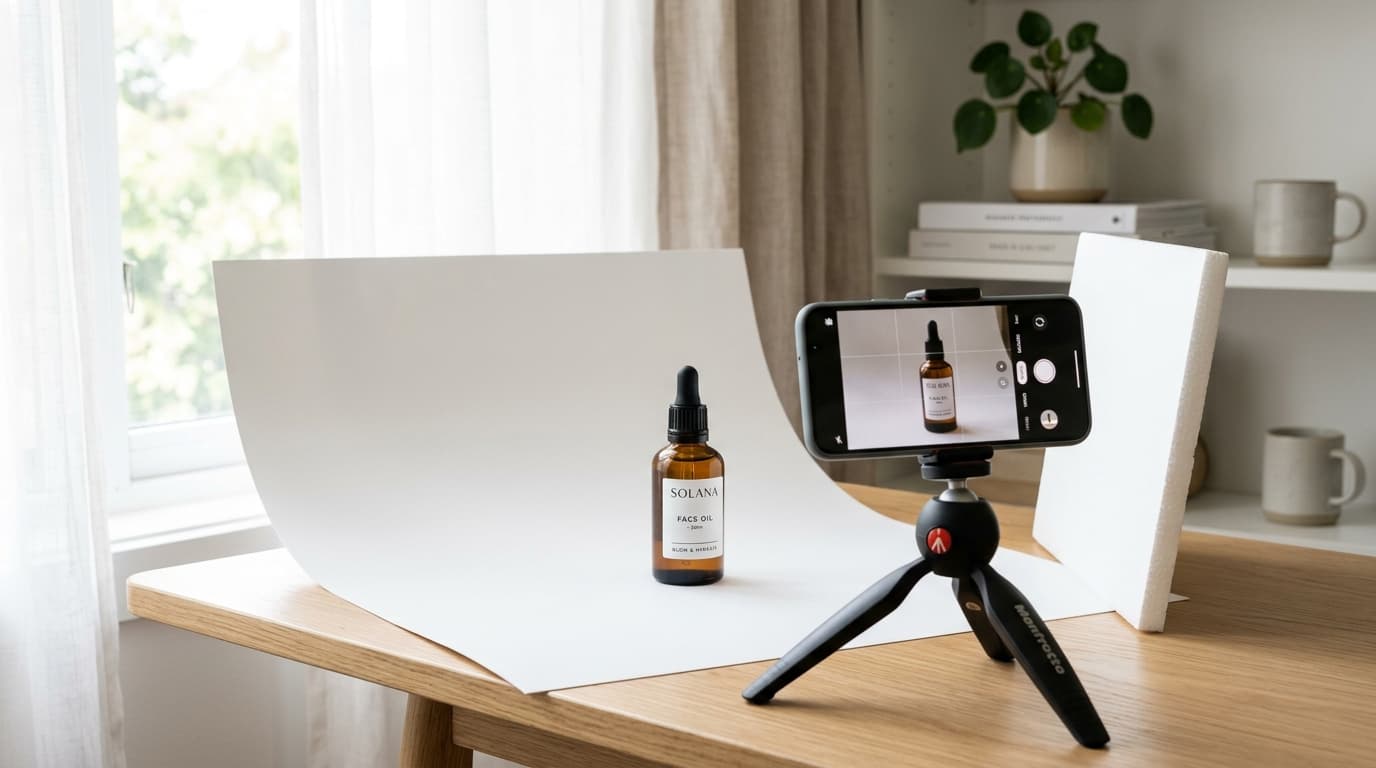
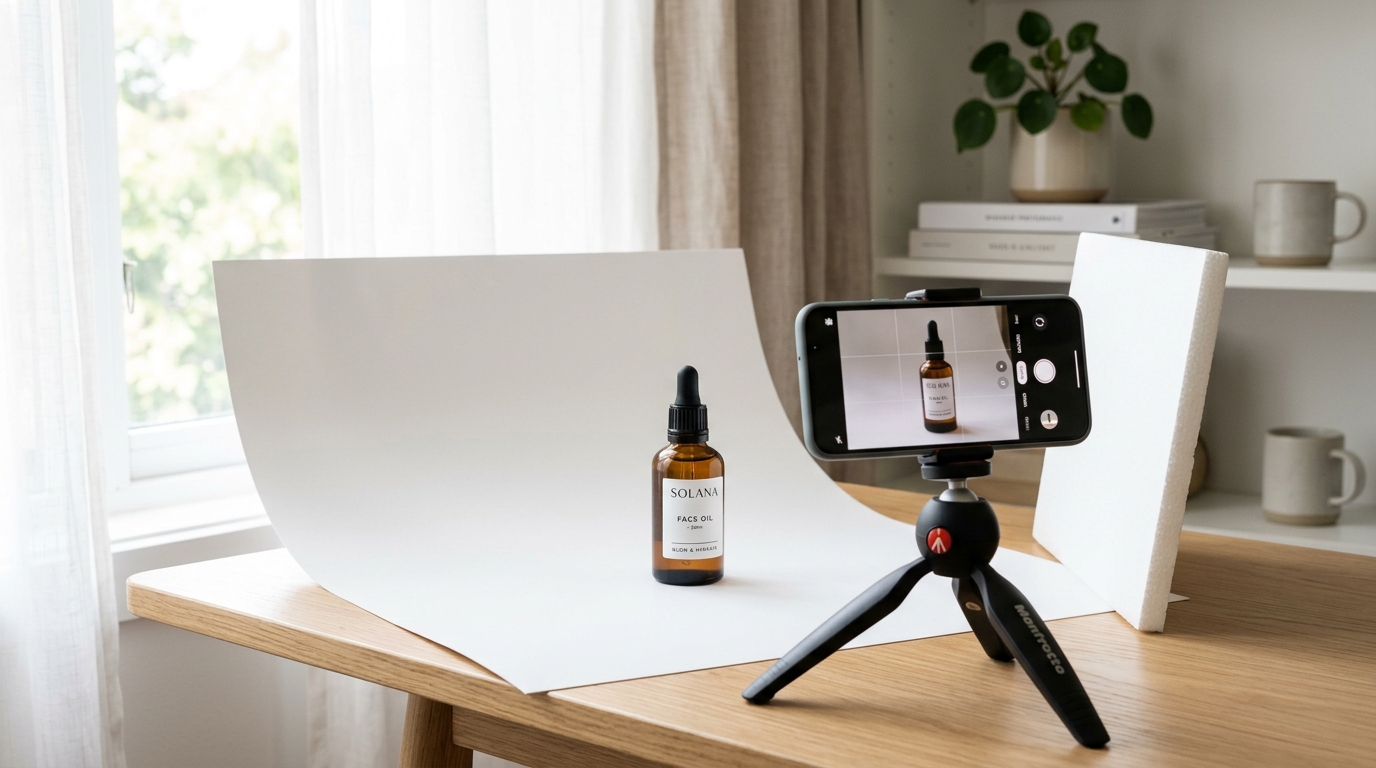 Beginner DIY product photography setup with a phone, window light and white backdrop
The hardest part of product photography is rarely the camera hardware. It is controlling all the little environmental variables that shift from one photo to the next: one product is shot near a sunny window, the next under a yellow ceiling lamp; one photo is shot straight-on, the next tilted downward; one backdrop is bright white, another dull grey.
The result is a storefront catalog that feels disjointed and amateurish, even when the products themselves are exceptional. By mastering a simple DIY tabletop setup, you can produce clean, standardized visuals from home without hiring a production crew.
1. Start with the space you already have
You do not need a dedicated spare studio room. A kitchen table, desk, or sturdy folding table in the corner of a room is plenty of space for small-to-medium products like cosmetics, jewelry, packaged goods, accessories, and shoes.
A few physical factors matter more than room size:
- Surface stability: The table must not wobble when you walk past or adjust the camera.
- Uncluttered perimeter: Clear at least 3 feet of space around the table so you can move lights, position tripods, and arrange items comfortably.
- Controllable ambient light: Avoid rooms with conflicting overhead lights or fluctuating fluorescent bulbs.
Keep the same shooting area for your entire catalog. Moving between different rooms changes your lighting angles, ambient reflections, and color temperatures, creating tedious retouching work later.
2. Use a window before buying lighting
For your first DIY setup, a large window is often the easiest and most flattering light source to work with.
Position your table beside the window rather than directly in front of it. You want light to wash across the product from the side (roughly 45 to 90 degrees), creating gentle dimensional shadows that reveal texture, shape, and depth.
- Avoid direct beams of sunlight: Harsh midday rays create blinding specular hotspots and pitch-black cast shadows.
- Diffuse the daylight: Hang a sheer white curtain or tape a sheet of white tracing paper over the glass to turn the window into a giant softbox.
- Overcast days are ideal: A cloudy sky acts as nature's softbox, providing diffused, shadowless daylight.
- Turn off household room lights: Never mix natural daylight (5500K) with warm ceiling bulbs (2700K). Mixed lighting creates strange color casts on your products that are difficult to correct in post-production.
3. Build a clean background with simple materials
For most e-commerce listings and marketplace standards (such as Amazon and Google Shopping), a plain white or light neutral background is the cleanest starting point.
Instead of expensive studio vinyl, you can use:
- A sheet of heavy white poster board or matte foam core ($3–$6).
- A roll of white seamless craft paper.
- A light grey stone tile or smooth marble pastry slab.
The Seamless Sweep Trick: Avoid creating a hard horizontal corner line behind your product. Tape the top of your poster board to a wall or cardboard box, and let it curve gently down onto the tabletop. This seamless sweep creates an infinity horizon with no harsh seams.
Inspect your background before shooting. Small lint specks, pencil marks, and dust particles become glaringly obvious once an image is cropped for a high-resolution zoom gallery.
4. Add a white card before you add another light
When one side of your product looks too dark under window light, beginners often rush to add a second lamp. A simpler, more effective technique is using a white bounce reflector.
Take a piece of white foam board or stiff white cardstock and stand it upright on the tabletop, directly opposite the window.
- Move it closer: The shadow on the dark side of the product becomes lighter and softer.
- Move it farther away: The shadow deepens, adding dramatic contrast.
This simple reflector card balances exposure without requiring electrical outlets, extra stands, or color-matching headaches. Do not aim to eliminate shadows completely—subtle shadows are necessary to give physical products three-dimensional depth.
5. Use your phone — but make it stable
Modern smartphones feature capable image sensors and computational image processing, making them more than adequate for e-commerce photography.
However, close-up tabletop photography magnifies camera shake. Handholding a phone introduces micro-movements that soften edge sharpness and blur fine product details.
- Mount the phone on a tripod: Use an inexpensive tabletop tripod or phone clamp ($15–$25) to lock the device firmly in place.
- Avoid digital zoom: Digital pinch-to-zoom degrades pixel quality and introduces grain. If your phone has a dedicated 2x or 3x optical telephoto lens, use that; otherwise, physically move the tripod closer to the product while keeping the lens level.
- Use the rear camera: Always shoot with the main rear camera lens, never the front selfie camera.
6. Keep camera settings simple
Do not get bogged down in complicated manual camera apps when starting out. Focus on these basic rules:
- Clean the camera lens: Wipe your phone lens with a microfiber cloth before shooting. Pocket oils and fingerprints create a hazy, low-contrast fog over photos.
- Lock focus and exposure (AE/AF Lock): Tap and hold your phone screen on the product's primary detail (e.g., the label or center logo) until the focus locks.
- Adjust the brightness slider: Drag the exposure slider slightly down if white backgrounds look blown out or if details on the product are washing out.
7. Position the product before you position the camera
Always dress, clean, and align the product first before touching your tripod:
- Make sure brand labels face directly toward the viewing angle.
- Straighten bottle caps, zipper pulls, and garment seams.
- Wipe away smudges with an optical cloth.
Position your camera level with the product (at eye level) rather than pointing dramatically downward. Eye-level framing presents the product naturally, making it easier for customers to judge proportions.
Once you find the ideal camera height and product placement, mark their positions on the table with small pieces of masking tape. This makes batch shooting dozens of items seamless.
8. Create a small shot list for every product
A DIY product photography workflow becomes efficient when you stop improvising every shot. Define a standardized 3-to-4 image package for each SKU before starting:
- Hero front view: The primary thumbnail image showing the complete product.
- Secondary angle: A 45-degree three-quarter or profile view showing depth and thickness.
- Close-up detail: A tight crop highlighting craftsmanship, stitching, ingredients, or hardware.
- Context / Scale reference: An on-model or styled view that communicates physical size.
Write this shot list on an index card and keep it beside your table.
9. Match the setup to your product material
Different product surfaces interact differently with light:
- Matte cardboard & paper packaging: Very forgiving; works easily with soft window light.
- Glossy plastic, glass & liquids: Reflect room surroundings. Use larger diffusion sheets and adjust your bounce card to wrap smooth white highlights across curves.
- Jewelry & polished metals: Mirror everything in the room. Surround the piece with white cards or a light cone. (For detailed techniques, read our guide on How to Photograph Jewelry Without a Macro Lens).
- Apparel & clothing: Requires steaming and shaping to look crisp. For tabletop clothing staging, see our Flat Lay Clothing Photography Guide.
10. Photograph flat lays without rebuilding your room
Top-down flat lays require pointing the camera straight down at a 90-degree angle. The same lighting rules apply: side window light, diffused illumination, and a bounce reflector.
- Secure your phone with an overhead tripod arm or boom mount—never balance a phone precariously on books where it can fall onto products.
- Keep garments neatly arranged with breathing room around the edges.
- If shooting ghost mannequin styles, review our Ghost Mannequin Photography Guide.
11. Shoot a quick test before doing the whole catalog
Before photographing 40 products, shoot a complete test set of one item. Download the images, view them on a desktop computer and mobile phone, and ask:
- Is the product sharp when zooming in on the label?
- Is the white background clean and neutral?
- Are product colors accurate to the physical sample?
- Is the shadow soft and natural?
- Is the camera framing repeatable across other SKUs?
Catching a lighting error on your first test shot takes two minutes to fix; discovering it after shooting 50 products wastes an entire weekend.
12. Common DIY mistakes to avoid
- Over-lighting the scene: Blasting products with multiple harsh lamps washes out surface textures.
- Handheld shooting: Causes micro-blur and inconsistent framing between SKUs.
- Dirty staging surfaces: Leaving dust, lint, and smudges on products creates hours of tedious Photoshop cleanup.
- Altering camera angles mid-batch: Changing tripod height between products makes collection listing grids look messy.
- Mixed color temperatures: Leaving warm ceiling bulbs turned on while shooting with daylight.
A practical 30-minute DIY workflow
| Step | Time | Task |
|---|---|---|
| 01. Clear & Stage | 5 mins | Wipe table, set up curved white sweep paper, turn off room lights. |
| 02. Position Light | 5 mins | Move table beside window, hang diffusion curtain, place white bounce card opposite. |
| 03. Mount Camera | 5 mins | Lock smartphone onto mini tripod at eye level, clean camera lens. |
| 04. Tape Coordinates | 3 mins | Place masking tape markers on table for tripod legs and product position. |
| 05. Test Shot | 2 mins | Capture one test shot, inspect exposure and sharpness on screen. |
| 06. Batch Shoot | 10 mins | Swap in products, shoot standard angles, wipe surfaces between items. |
When to add artificial lighting
While natural daylight is free and accessible, it changes throughout the day as clouds move and the sun sets.
When your catalog grows and you need to shoot at night or on strict schedules, upgrade to one large continuous LED panel or softbox kit ($50–$150). A single continuous daylight-balanced source (5500K) replicates the soft window look 24 hours a day. (For in-depth light recommendations, consult our Product Photography Lighting Guide).
Where AI can help after the DIY shoot
A simple home DIY setup is the best way to capture an authentic, high-resolution source photo of your real product. Once you have that clean source photo, you do not need to rebuild a physical set every time you need new marketing creative.
With Shotinger Product Studio, you can take your clean DIY packshot and instantly generate:
- Over 20+ studio and lifestyle environments with realistic lighting and soft drop shadows.
- On-model presentations with Apparel Studio and Jewelry & Accessories.
- Multiple camera angles and aspect ratios tailored for Shopify, Amazon, Instagram, and TikTok ads.
AI does not replace your real product—it acts as an asset multiplier that turns one clean DIY photo into an entire commercial image suite.
Final visual checklist: your DIY product photography setup
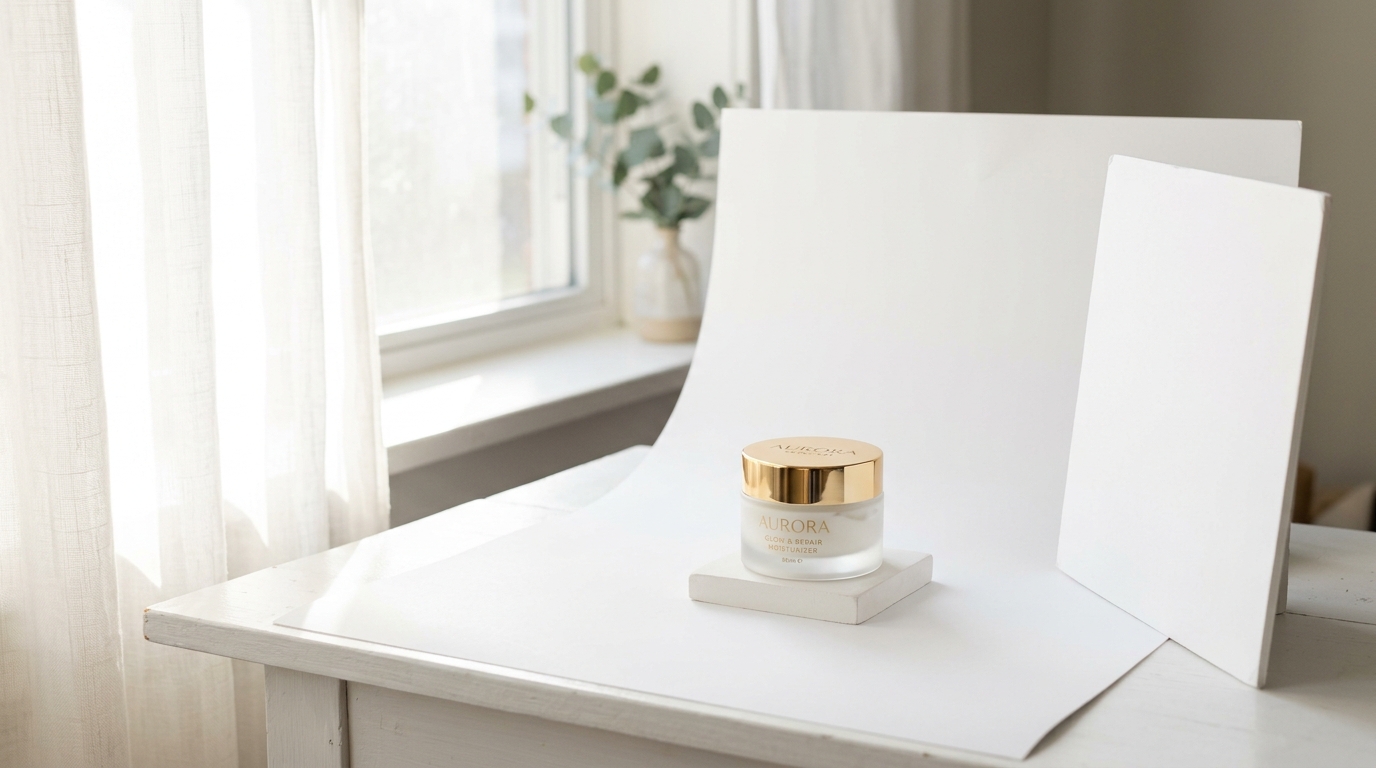 Product on a white sweep beside a window with soft natural light
Window light: place the product beside the window and keep the light soft and diffused.
Product on a white sweep beside a window with soft natural light
Window light: place the product beside the window and keep the light soft and diffused.
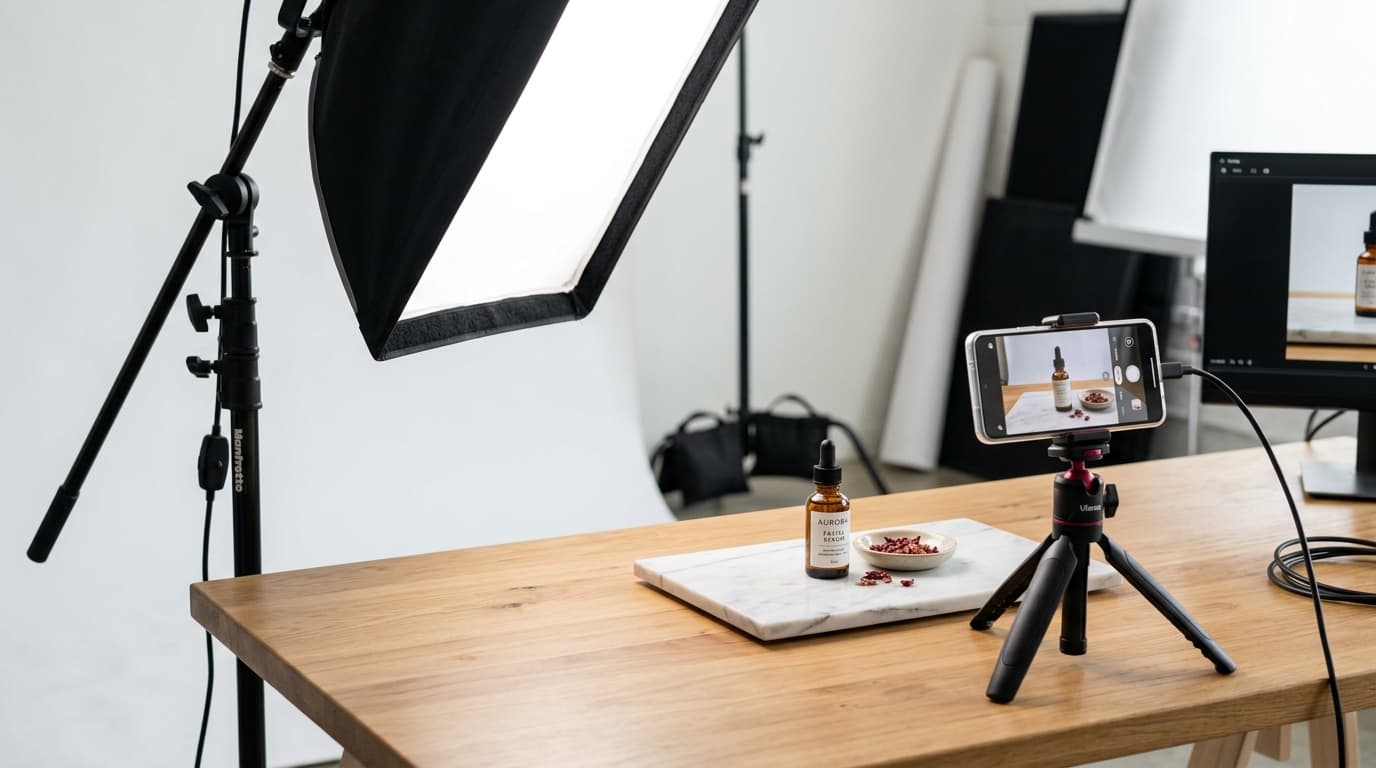
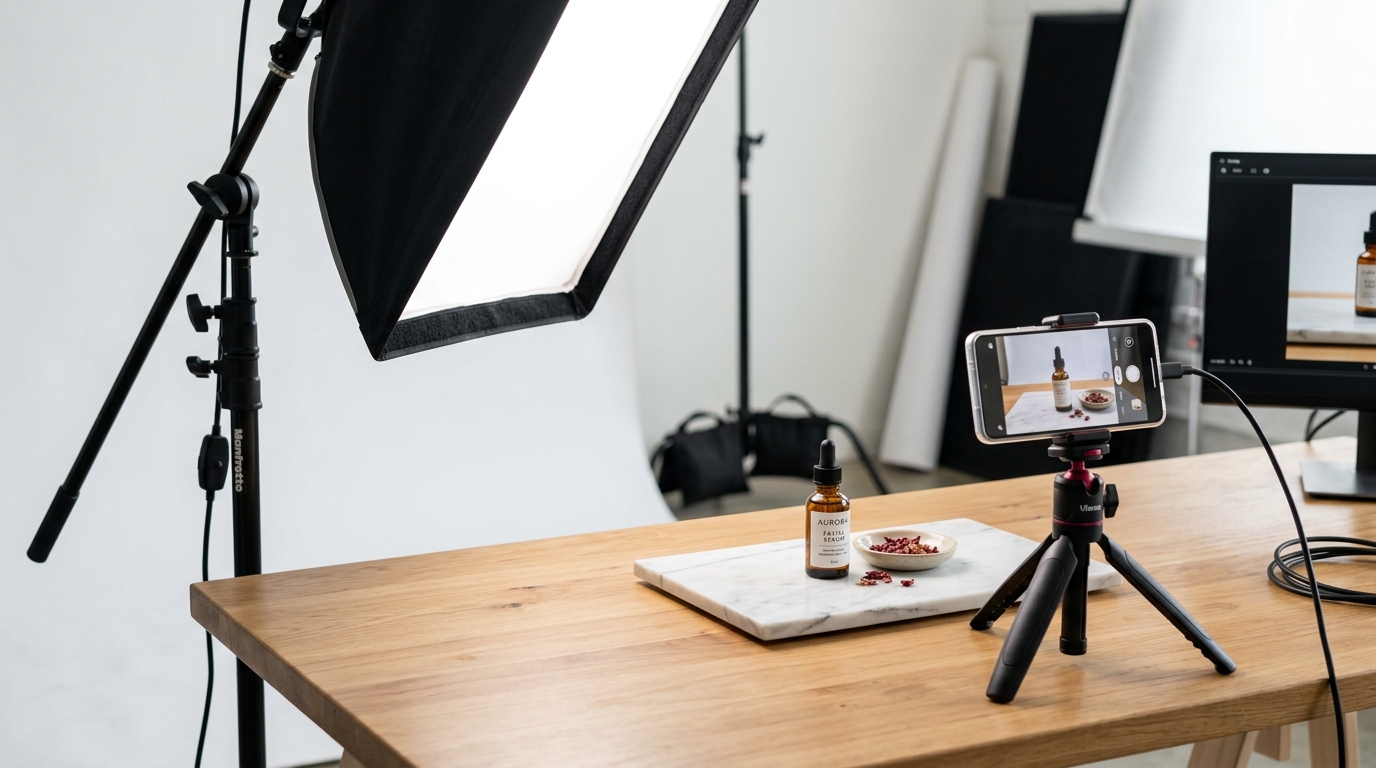 Product photography setup with a large softbox and a white reflector
Artificial light: one large continuous softbox and a white bounce board create a repeatable setup.
Product photography setup with a large softbox and a white reflector
Artificial light: one large continuous softbox and a white bounce board create a repeatable setup.
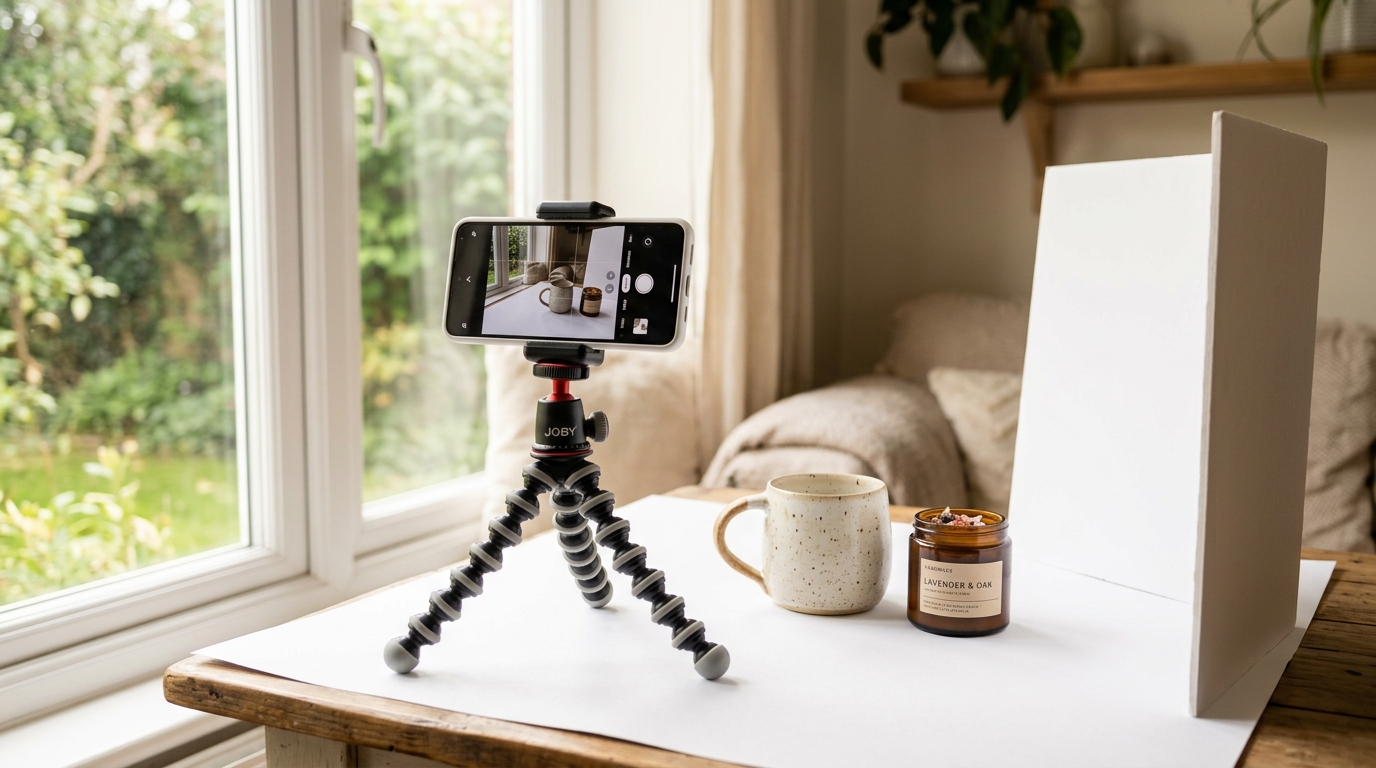 Consistent product photography setup with marked positions and tools nearby
Consistency: mark positions with tape, keep microfiber tools nearby, and maintain uniform framing.
Consistent product photography setup with marked positions and tools nearby
Consistency: mark positions with tape, keep microfiber tools nearby, and maintain uniform framing.
The 10-second pre-shoot check
- Tabletop surface is stable, level, and free of clutter
- Product is cleaned, lint-rolled, and free of fingerprints
- Background sweep is smooth, clean, and curved without hard crease lines
- Key light enters from one side (window or softbox)
- Conflicting room ceiling lights are switched off
- Smartphone or camera is firmly locked on a tripod
- Camera lens has been wiped clean with a microfiber cloth
- Product and tripod floor positions are marked with tape
- Same focal distance and framing are used across the entire batch
- A test shot has been reviewed on a large screen before shooting the full catalog
Frequently asked questions
Do I need a DSLR for a DIY product photography setup?
No. A modern smartphone is more than capable of capturing commercial-grade product photos. Camera stability, soft diffused lighting, a clean background sweep, and consistent framing matter far more than owning an expensive camera body.
What is the cheapest way to start product photography at home?
Start with your smartphone, a sturdy table beside a bright window, a sheet of white poster board ($3) curved into a sweep, a white foam core board ($4) for bounce fill, and an inexpensive tabletop tripod ($15).
What is the best light for a beginner?
Soft, diffused light is the easiest to master. A north-facing window diffused with sheer curtains is the best natural source. If shooting with artificial light, a single large continuous LED softbox (5500K) provides predictable results.
How do I keep my product photos consistent?
Keep your table, background, lighting distance, and tripod height fixed. Mark product and tripod leg positions with masking tape so you can accurately rebuild the identical setup for future product drops.
Can DIY product photography look truly professional?
Yes. Professional e-commerce packshots are defined by sharp focus, clean backgrounds, controlled reflections, and accurate colors—all of which are achievable with a properly controlled DIY home setup.
Final thought
A great DIY product photography setup is not the one with the most expensive equipment. It is the one you can rebuild tomorrow and achieve the exact same clean, predictable result. Start small, control your lighting, keep your camera steady, and standardize your process. Once that foundation is solid, scaling your e-commerce catalog becomes effortless.
Ready to turn your DIY product photos into commercial imagery?
Generate studio-quality lifestyle and on-model photography from your clean product photos with Shotinger.
Explore Shotinger Product Studio →
Start creating campaign-ready product visuals
Transform flat lays, packshots, and jewelry photos into photorealistic on-model imagery in under 60 seconds.