The Ecommerce Shoe System: Photographing one pair of shoes is straightforward—photographing an entire catalog while keeping every angle, scale, and lighting ratio uniform is a completely different challenge. A high-converting footwear product page does not need dozens of random angles; it requires a standardized 7-image system that systematically answers every buyer question.
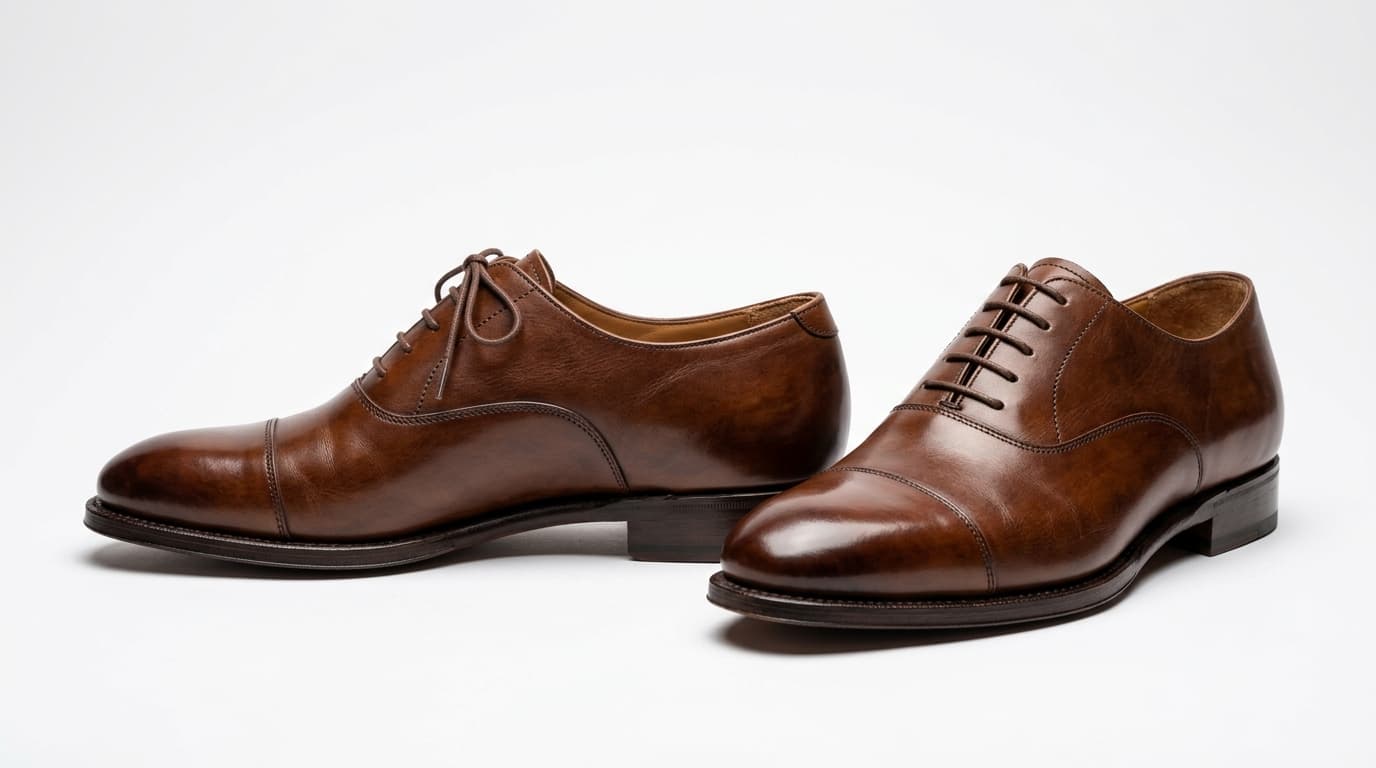
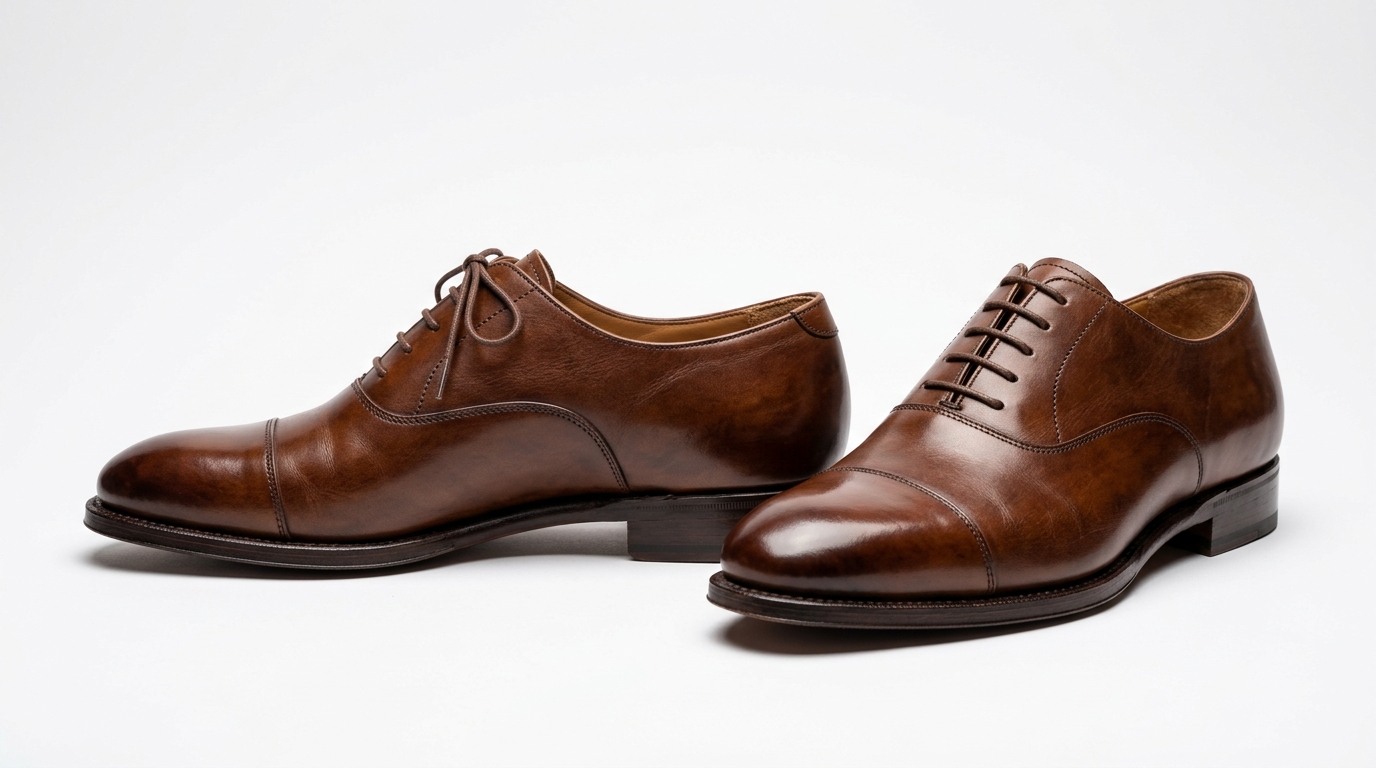 Shoe product photography of a pair of leather shoes on a clean white background
Photographing one pair of shoes is not especially difficult. Photographing the same type of shoe again and again while keeping every image consistent is a different challenge.
That is where shoe product photography becomes more than simply taking a few attractive pictures. For an ecommerce brand, your images need to work as a system. They should help customers understand the product, compare it with other styles, see important details, and feel confident about what they are buying.
A good shoe product page does not need dozens of random images. It needs the right images, presented in a consistent way.
In this guide, we will build a practical photography system for shoes, from preparing the product to choosing the right angles, lighting different materials, creating a repeatable setup, and deciding when traditional photography or AI-assisted imagery makes more sense.
Why Shoe Photography Is Different
A shoe is more complicated to photograph than it might first appear. It has volume, three-dimensional curvature, diverse materials, reflective hardware, and fine textures that can disappear completely depending on camera height and lighting direction.
A sneaker, for example, may combine technical mesh, molded rubber, contrast stitching, nylon laces, synthetic overlays, and a distinctive tread pattern. A leather boot introduces rigid ankle height, natural leather creasing, and burnished edge finishes. A stiletto heel relies entirely on elegant silhouette balance, while an open-toe sandal depends on strap placement and footbed ergonomics.
The first image can make the product look good. But a complete product gallery needs to answer much more. A customer evaluating footwear online is actively looking for specific reassurance:
- What does the shoe look like from the side? (Sole thickness, drop, toe spring, and arch profile)
- How tall is the heel or platform? (Real-world elevation and stance)
- What does the back look like? (Pull tabs, heel counters, Achilles padding, and branding)
- Is the material smooth, matte, or heavily textured? (Leather grain, knit density, and finish)
- What does the sole tread look like? (Grip pattern, lug depth, and surface traction)
- How does the shoe look when worn? (Proportion against trousers, ankle fit, and real-life styling)
That is why the best shoe photography starts with the questions the customer needs answered, rather than the camera or lens you own.
The 7-Image Shoe Product System
There is no universal number of photos every shoe needs. Instead, think about the specific role of each image. A practical standard for modern DTC and marketplace footwear listings is a cohesive seven-image system.
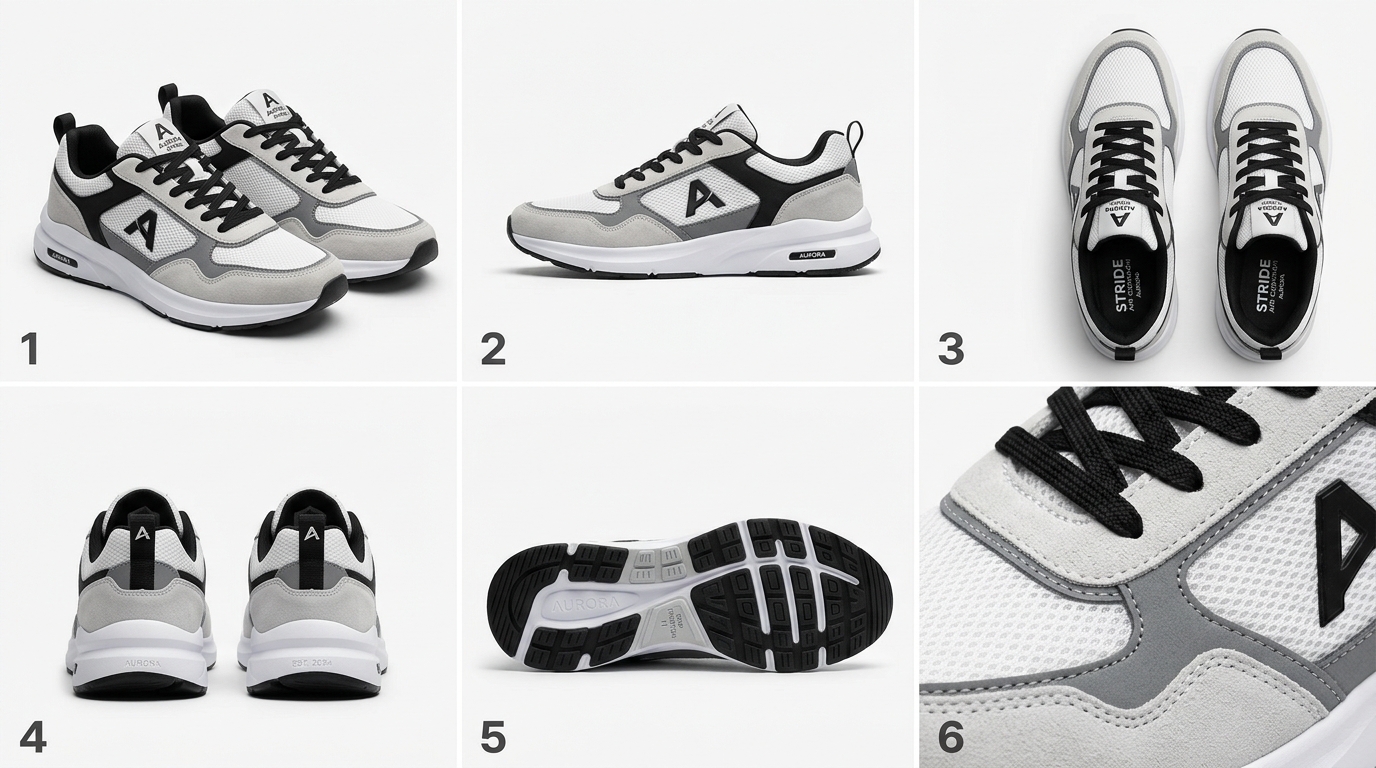 The 7-image shoe product photography system showcasing six essential studio angles
1. The Main Product Image (Hero Shot)
This is the hero image that introduces the shoe in catalog feeds and search listings. The product should be immediately recognizable. Keep the composition clean, center-weighted, and free of distracting props.
For most ecommerce catalogs, this is not the place to experiment with complicated creative direction. A three-quarter front-facing angle featuring the pair—with the primary shoe angled forward and the secondary shoe resting naturally just behind it—allows shoppers to immediately grasp the toe profile, lacing, and side silhouette in one glance.
2. The Side Profile View
The lateral side view is one of the most critical photographs for footwear. It reveals the exact silhouette, stack height, sole cushioning, heel-to-toe drop, collar height, and overall proportions. For performance running shoes, lifestyle sneakers, leather boots, and dress shoes, the side profile communicates the exact design stance of the footwear.
3. The Top or Three-Quarter View
A top-down or elevated three-quarter perspective gives customers information that a flat side view cannot provide. It displays the shape of the toe box (narrow, almond, round, or wide), tongue construction, lacing system, eyelets, insole branding, and overall footbed width.
4. The Back View
The rear angle is often neglected by inexperienced sellers, yet it carries vital technical and aesthetic information. Customers inspect the back view to examine heel cup reinforcement, Achilles support, pull tabs, rear branding, outsole wrap, and stitching symmetry.
5. The Sole Tread Shot
While the outsole is rarely the prettiest part of a shoe, it is often a decisive conversion factor. Shoppers looking at trail running shoes, hiking boots, work boots, or skate shoes want to verify lug depth, tread pattern, rubber compound, and flex grooves. Elevate the shoe vertically or photograph the clean outsole flat against your backdrop sweep.
6. The Macro Detail Shot
Dedicate one image to a close-up macro perspective. Highlight the craftsmanship and material quality that justify the price tag: hand-stitched welt seams, genuine leather grain, breathable engineered mesh, brass eyelets, or embossed logos. Close-up images build tactile confidence when customers cannot touch the shoe in person.
7. The On-Foot or Lifestyle Context Image
The final image answers the emotional question: "How does this shoe look on a person in the real world?" An on-foot lifestyle photograph demonstrates scale, ankle height, pant break, and styling versatility. A clean white-background packshot proves what the product is, while an on-foot image helps the customer visualize owning and wearing it.
The Shot List Should Change by Shoe Type
While the core 7-image framework remains the foundation, adjust visual emphasis depending on the footwear category:
| Shoe Category | Priority Angles | Key Visual Features to Emphasize |
|---|---|---|
| Sneakers & Trainers | Side Profile → 3/4 Hero → Sole Tread → On-Foot | Midsole cushioning, outsole grip, mesh breathability, collar padding |
| Boots & Workwear | Side Silhouette → Back Heel → Shaft Profile → Leather Detail | Shaft stiffness, zipper/gusset construction, welt stitching, lugged sole |
| High Heels & Pumps | Lateral Profile → Heel Stem → Toe Box → On-Foot | Heel curvature, arch elevation, pitch angle, ankle strap closure |
| Sandals & Slides | Top-Down Footbed → 3/4 Angle → Strap Hardware → Sole | Footbed contouring, buckle adjustments, strap linings, material flexibility |
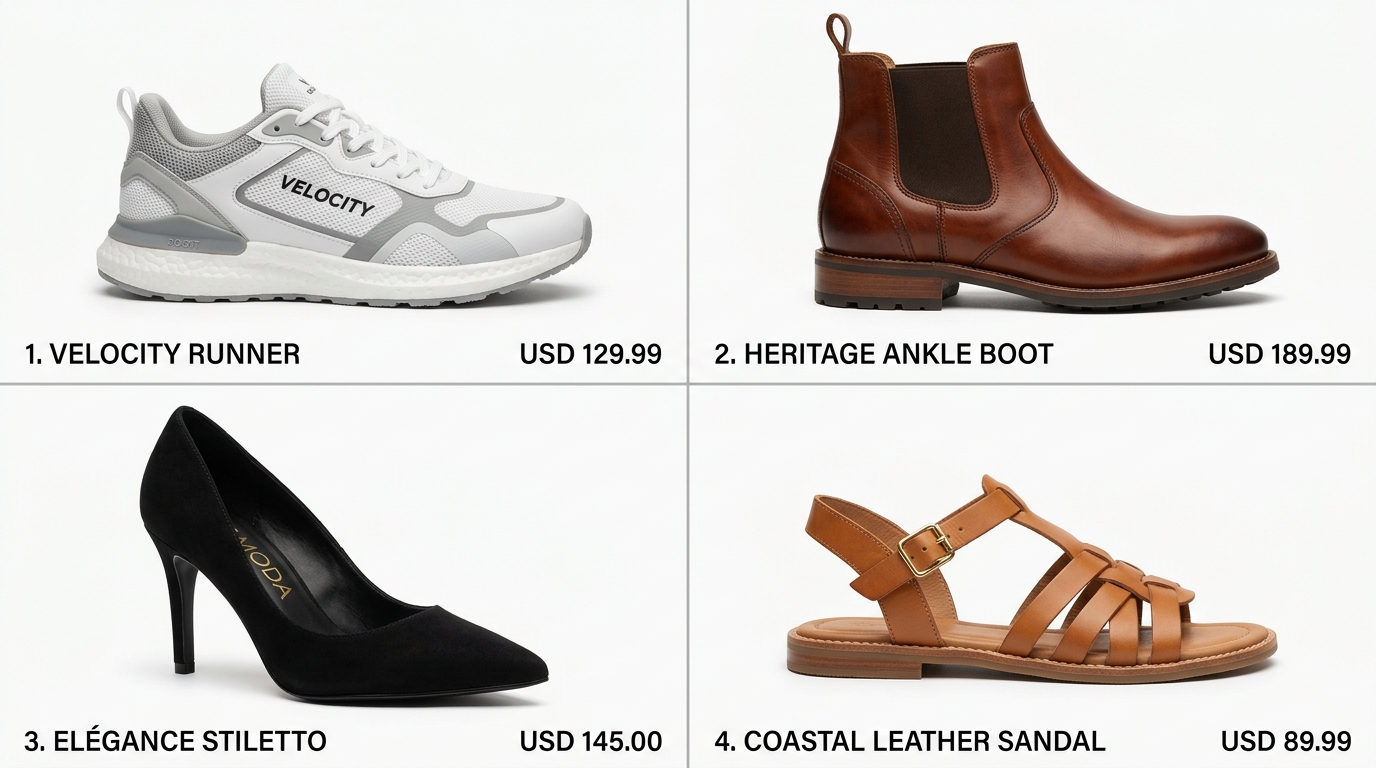 Four shoe types and material comparison showing sneakers, boots, heels, and sandals
Sneakers
For athletic and casual sneakers, customers scrutinize technical materials and comfort indicators. Highlight the midsole geometry, sole tread patterns, lace eyelets, and flexible knit uppers. Keep the silhouette energized and lightweight.
Boots
For Chelsea boots, lace-up boots, and equestrian styles, keeping the shaft upright is essential. A collapsed, floppy boot shaft looks used and unappealing. Insert foam boot shapers or rolled cardboard so the leather stands tall and proud during shooting.
High Heels
Silhouette and balance are everything for formal footwear. Ensure the shoe sits perfectly level on the surface without tilting or wobbling. Capture the exact curvature of the heel stem and the arch pitch from a direct, eye-level side profile.
Sandals & Mules
Because sandals lack an enclosed upper, the internal footbed and strap mechanics are on full display. Top-down and 45-degree elevated shots allow shoppers to evaluate arch contouring, strap placement, and toe separator comfort.
Prepare the Shoe Before Taking the First Photo
Photography problems often begin before the camera shutter is ever pressed. A shoe that is dusty, scuffed, wrinkled, or poorly laced requires hours of tedious Photoshop retouching.
Spend 5 minutes meticulously prepping every shoe before it touches the set:
- Wipe away dust and lint: Use a soft microfiber cloth and a mini air blower on leather and plastic. Use a sticky lint roller or crepe suede brush for suede and nubuck.
- Inspect the soles: Ensure the outsoles are pristine and free of warehouse price stickers, barcode adhesive, or shop-floor dirt.
- Stuff and shape the toe box: Soft knit sneakers and unstructured leather shoes easily cave in under studio lights. Pack the inside with acid-free tissue paper, dense foam inserts, or a shoe tree to produce a smooth, filled-out shape.
- Style the laces neatly: Symmetrical, clean lacing elevates the perceived value of a shoe instantly. Tuck excess lace ends cleanly inside the shoe opening or tie neat, uniform loops that sit flush against the tongue.
- Straighten the tongue: Ensure the tongue sits centered and straight, without bunching or twisting to either side.
- For tall boots: Insert rigid cardboard rolls, inflatable boot shapers, or foam noodles into the shaft so the collar remains perfectly upright and crisp.
Use One Fixed Camera Position for the Entire Catalog
A common pitfall in DIY footwear photography is moving the camera tripod between every single pair. The photographer shoots a low-top sneaker, picks up the tripod, angles downward for a slide, then backs up for an ankle boot.
By the end of the day, your catalog looks chaotic: some shoes appear photographed from above, others from below, with mismatched scale and inconsistent perspective distortion.
A professional ecommerce catalog relies on a locked reference station:
- Fixed Camera Height: Position the camera lens roughly 2 to 4 inches above tabletop height, tilted slightly downward (about 10 to 15 degrees) so both the sole profile and the top lacing remain visible.
- Fixed Focal Distance: Use a focal length between 70mm and 105mm (or 2x–3x telephoto on smartphones). Avoid ultra-wide lenses (under 35mm), which distort shoe proportions, making the toe box look unnaturally elongated.
- Mark the Base Positions: Apply small pieces of blue painter's tape on the table surface to outline the exact placement of the left and right shoe soles. When swapping out colorways or styles, place the new pair directly onto the tape guides.
When your camera, lighting, and placement are locked, shooting 50 pairs takes a fraction of the time, and your website catalog looks remarkably clean and cohesive.
Lighting Different Shoe Materials
No single lighting setup works identically for every footwear material. Matte suede absorbs light, polished calfskin bounces harsh reflections, and technical synthetics produce specular hot spots.
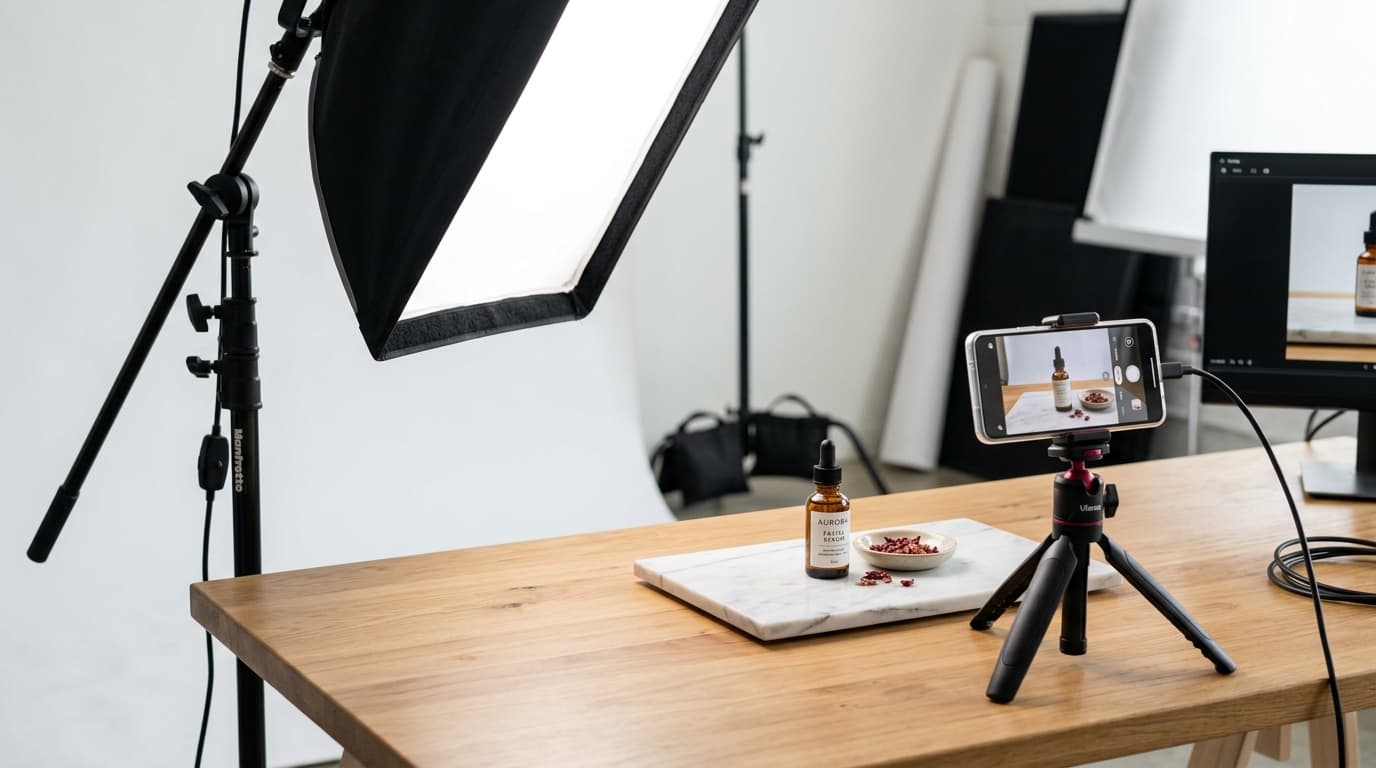
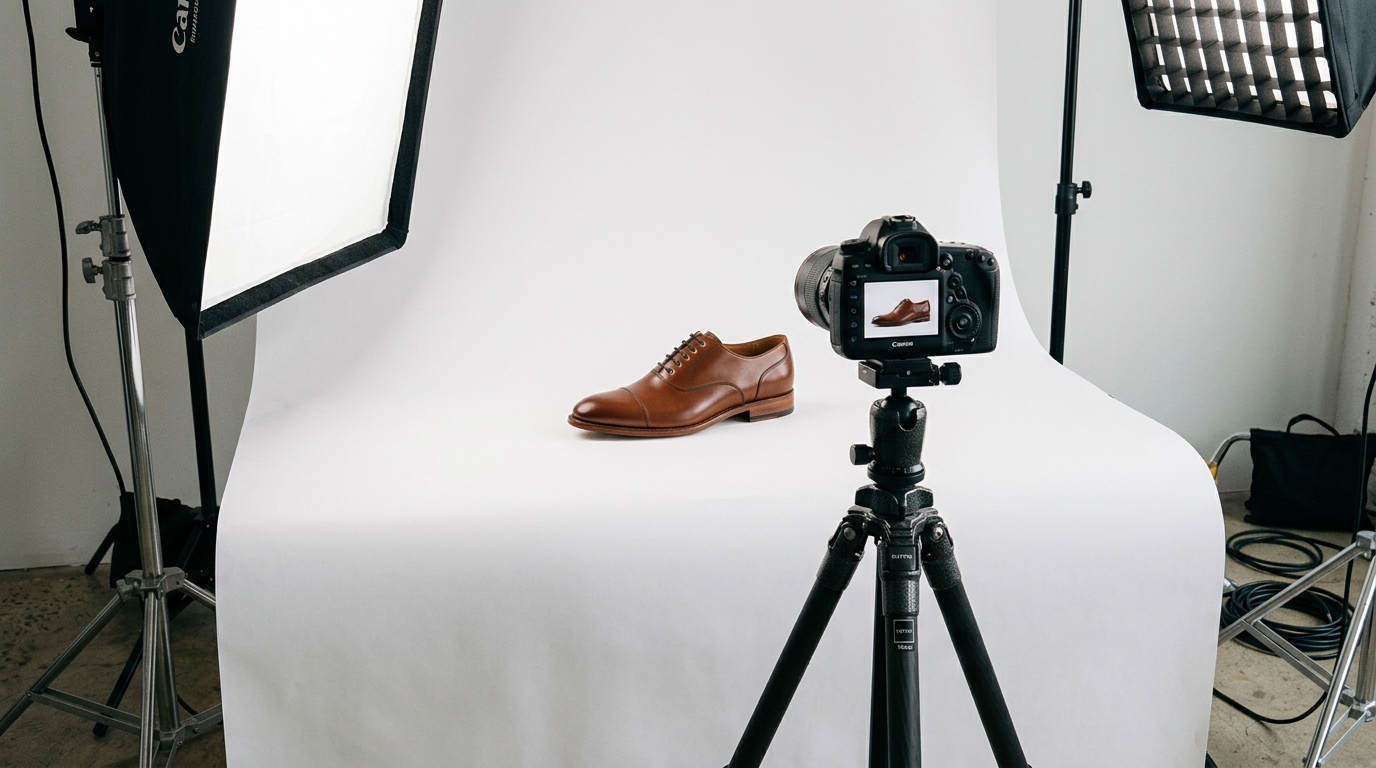 Studio footwear photography setup with continuous softbox lighting and white background sweep
Full-Grain & Calfskin Leather
Smooth leather requires broad, diffused light. A large softbox or a diffused window positioned at 45 degrees creates a smooth, gentle highlight gradient across the curved toe and vamp without creating blown-out white glare spots. Use a white foam bounce board on the opposite side to soften shadows along the inner arch.
Suede & Nubuck
Suede is defined by its velvety, napped texture. If your lighting is too flat and direct, suede looks lifeless, dull, and chalky. Introduce subtle directional rim lighting from the side or slightly behind the shoe to cast microscopic micro-shadows across the fibers, accentuating its rich texture.
Engineered Mesh & Knit
Modern running shoes feature multi-layered mesh weaves. Avoid over-sharpening the images in post-processing, which creates buzzing moiré artifacts. Soft side lighting reveals the knit structure while preserving natural fabric softness.
Patent Leather & High-Gloss Synthetics
Patent leather acts like a dark curved mirror, reflecting your room, light bulbs, and camera setup. Do not simply blast patent shoes with more light. Instead, use large diffusion panels (scrims) placed close to the shoe to turn harsh light sources into wide, seamless white reflections.
(For an in-depth breakdown of continuous LED softboxes, strobes, and diffusion modifiers, explore our Product Photography Lighting Guide.)
A Simple DIY Shoe Photography Setup
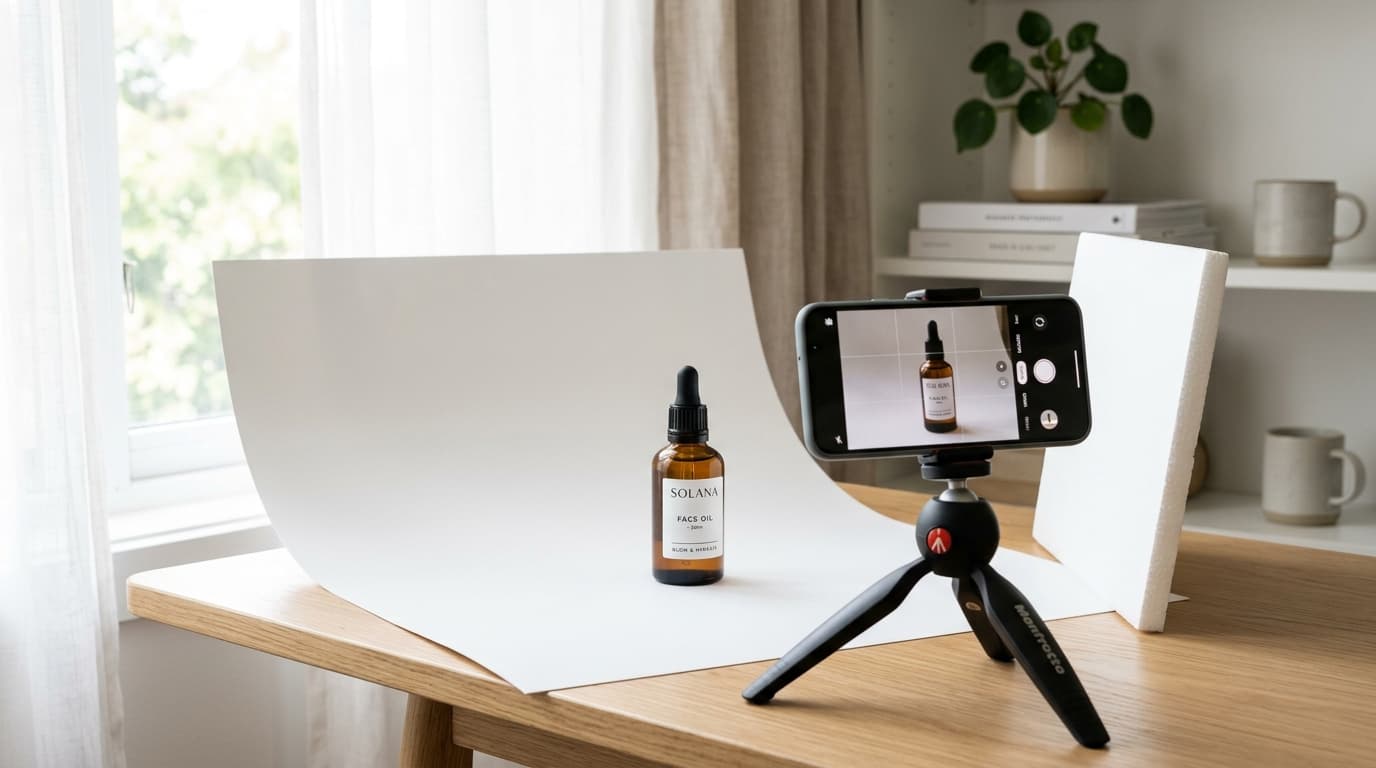
You do not need a multi-thousand-dollar studio to produce catalog-ready footwear images. A reliable home tabletop setup can be assembled with minimal gear:
- A sturdy table: Positioned away from distracting foot traffic.
- A seamless sweep: A sheet of white matte poster board or a roll of 26-inch white seamless paper, taped smoothly from the wall down across the tabletop.
- One primary key light: A large continuous LED softbox (5500K daylight-balanced) or a bright, indirect north-facing window.
- A white bounce card: A $4 piece of white foam core board placed on the shadow side to reflect fill light into dark crevices.
- A tripod or stable smartphone mount: Keeps your framing locked and eliminates camera shake for razor-sharp product photos.
(Need step-by-step instructions on setting up your space on a budget? Check out our complete DIY Product Photography Setup for Beginners.)
Keep the Pair Looking Like a Pair
Footwear presents a unique compositional challenge: you are arranging two separate, asymmetrical objects into a balanced visual unit.
- The Standard 3/4 Offset: Place the outer shoe at a 45-degree angle pointing toward the camera. Place the rear shoe slightly behind it, angled at roughly 30 degrees, showing its inner profile.
- Avoid complete overlap: If the front shoe completely obscures the rear shoe, customers cannot verify the symmetry or see the inner collar.
- Avoid excessive separation: Placing the shoes far apart makes them look disconnected and leaves dead white space in the middle of your image frame.
- Maintain natural toe alignment: Both shoes should look grounded, resting naturally on their soles without rocking backward onto the heels.
Consistency Matters More as Your Catalog Grows
Imagine browsing an online shoe store with 80 different models. If Shoe A is shot from a bird's-eye view against warm cream, Shoe B is shot at eye level on stark white, and Shoe C is shot sideways in yellow tungsten light, your brand immediately loses trust.
Even if each individual photograph looks acceptable in isolation, the collection as a whole looks fragmented. A standardized photography protocol ensures:
- The horizon line remains identical across all catalog thumbnails.
- Shoe scale is uniform (a size 9 sneaker occupies roughly 75% of the frame width in every listing).
- Background values match pure
#FFFFFFhex code for clean marketplace compliance. - Color temperature is locked at 5500K so white soles stay crisp white, not dingy yellow.
Real Photography vs. AI-Assisted Imagery
Traditional tabletop photography remains irreplaceable for creating your foundational source packshots. You need physical reference images to verify genuine sole thickness, brand stitching, and authentic color rendering.
However, modern ecommerce brands frequently need dozens of creative variations for ad campaigns, social feeds, seasonal banners, and marketplace A/B testing that are cost-prohibitive to shoot physically.
This is where a hybrid workflow excels:
[ Physical Product Prep ]
          ↓
[ Capture Clean Packshots on White Sweep ]
          ↓
[ Inspect Real-World Color, Shape & Details ]
          ↓
[ Feed Clean Packshots into AI Studio Engine ]
          ↓
[ Generate On-Model & Contextual Lifestyle Scenes ]
When to Use Real Photography
- Primary Catalog Packshots: White-background ecommerce requirements for Shopify, Amazon, and Google Shopping.
- Fine Craftsmanship Inspection: High-resolution zoom galleries showcasing genuine leather grain, stitching, and hardware.
- Accurate Color Benchmarks: Ensuring the exact fabric dye lot matches the delivered product.
When to Use AI-Assisted Imagery
- On-Foot Lifestyle Context: Placing shoes on diverse AI fashion models walking on city streets, parks, or gym floors without renting locations or booking models.
- Seasonal & Thematic Campaigns: Generating autumn leaf backgrounds, minimalist architectural plinths, or urban concrete settings for digital ad creatives.
- Fast Concept Testing: Testing which background aesthetic or styling angle converts best before scheduling physical campaign shoots.
With tools like Shotinger Product Studio, brands can take a single clean packshot of a sneaker or heel and instantly produce photorealistic on-model and editorial lifestyle images while maintaining complete fidelity to the original footwear silhouette.
The Complete Shoe Photography Workflow
Follow this repeatable step-by-step sequence for every footwear batch:
- Product Prep: Clean the uppers, wipe outsoles, stuff toe boxes with tissue/foam, and straighten laces.
- Set the Stage: Tape a seamless white sweep, set key light at 45 degrees, and place a bounce card on the opposite side.
- Lock Camera & Position: Position the camera at slight downward eye-level, mount on a tripod, and mark shoe positions with tape.
- Shoot the Hero Shot: Capture the signature 3/4 offset pair shot on clean white.
- Execute the Standard Shot List:
- Lateral side profile
- Top-down / lacing view
- Rear heel view
- Outsole sole tread pattern
- Macro craftsmanship detail
- On-foot lifestyle context
- QC on a Large Monitor: Check 100% crop zoom for sharp focus on the laces, accurate color temperature, and clean edges.
- Generate Creative Variations: Feed clean packshots into Shotinger Product Studio to generate on-model and lifestyle variations for marketing.
Shoe Product Photography Checklist
Before pushing your footwear product images live, verify every item:
- Shoe is thoroughly cleaned, dusted, and free of manufacturing lint
- Toe box is firmly stuffed to preserve natural three-dimensional volume
- Laces are symmetrically tied and tucked; tongue is centered
- Boot shafts are supported internally and standing completely upright
- Hero 3/4 view clearly displays both shoes as a natural pair
- Lateral side profile accurately demonstrates stack height and sole drop
- Top view clarifies toe box shape and lacing ergonomics
- Rear view captures heel cup, pull tab, and Achilles support
- Outsole tread photo is clean, sharp, and clearly legible
- Close-up macro image highlights craftsmanship (leather grain, welt stitching)
- On-foot lifestyle image provides realistic scale and styling context
- Camera height, focal length, and distance are locked across the entire catalog
- Color temperature is calibrated so whites remain pure and colors are true to life
- Background is clean, seamless, and free of visible floor tape or creases
- Any AI-assisted lifestyle variations have been audited against the physical shoe for silhouette accuracy
Frequently Asked Questions
What is the best camera angle for shoe product photography?
For the main catalog hero image, a three-quarter angle (approximately 40 to 45 degrees toward the camera) is standard because it communicates toe shape, upper design, and side silhouette in a single view. The second most critical angle is the direct lateral side profile, which displays sole thickness, heel height, and sole drop.
How many photos should a footwear ecommerce listing include?
A standard high-converting footwear listing should have between 6 and 8 photos: a 3/4 hero pair shot, a lateral side profile, a medial inside profile, a top-down view, a rear heel shot, an outsole tread image, a close-up material detail, and at least one on-foot lifestyle image.
Can I photograph shoes with a smartphone?
Yes. Modern smartphones produce exceptional product photos when mounted on a tripod under soft, diffused lighting. Use the 2x or 3x telephoto optical lens to avoid the barrel distortion common to wide-angle smartphone lenses, which makes shoes look bulbous.
How do I prevent shoes from looking flat or lifeless in photos?
Avoid placing your primary light directly above or in front of the shoe. Instead, position your key light to the side at a 45-degree angle and use a white reflector board on the opposite side. This cross-lighting creates gentle gradients and shadow definition that reveal the shoe's curvature and material texture.
Should I show shoes individually or as a pair?
For the main hero thumbnail, showing both shoes as a pair (with the forward shoe angled at 45 degrees and the rear shoe tucked slightly behind it) looks balanced and assures customers they are buying a full pair. For technical angles like the lateral side profile, sole tread, and close-up details, isolating a single shoe creates a cleaner, less cluttered composition.
Final Thoughts
Great shoe product photography is not about owning high-end studio strobes or expensive medium-format cameras. It is about establishing a disciplined visual system that answers customer questions before they even have to ask.
By preparing every pair meticulously, locking your camera framing, following a structured 7-angle shot list, and leveraging AI tools to expand your lifestyle creative, you can build an ecommerce footwear catalog that commands premium pricing, reduces return rates, and converts casual browsers into confident buyers.
Ready to turn your shoe packshots into high-converting lifestyle campaigns?
Generate realistic on-model and contextual studio imagery from your clean footwear photos in seconds.
Explore Shotinger Product Studio →
Start creating campaign-ready product visuals
Transform flat lays, packshots, and jewelry photos into photorealistic on-model imagery in under 60 seconds.