Quick Answer: Flat lay clothing photography is the technique of photographing garments and accessories from above, laid out on a flat surface. It is fast, cost-effective, and ideal for showcasing entire garments, fabric colors, and construction details without hiring models or renting physical studio spaces. With the right surface, lighting, and composition, you can produce clean, high-converting product photos from home.
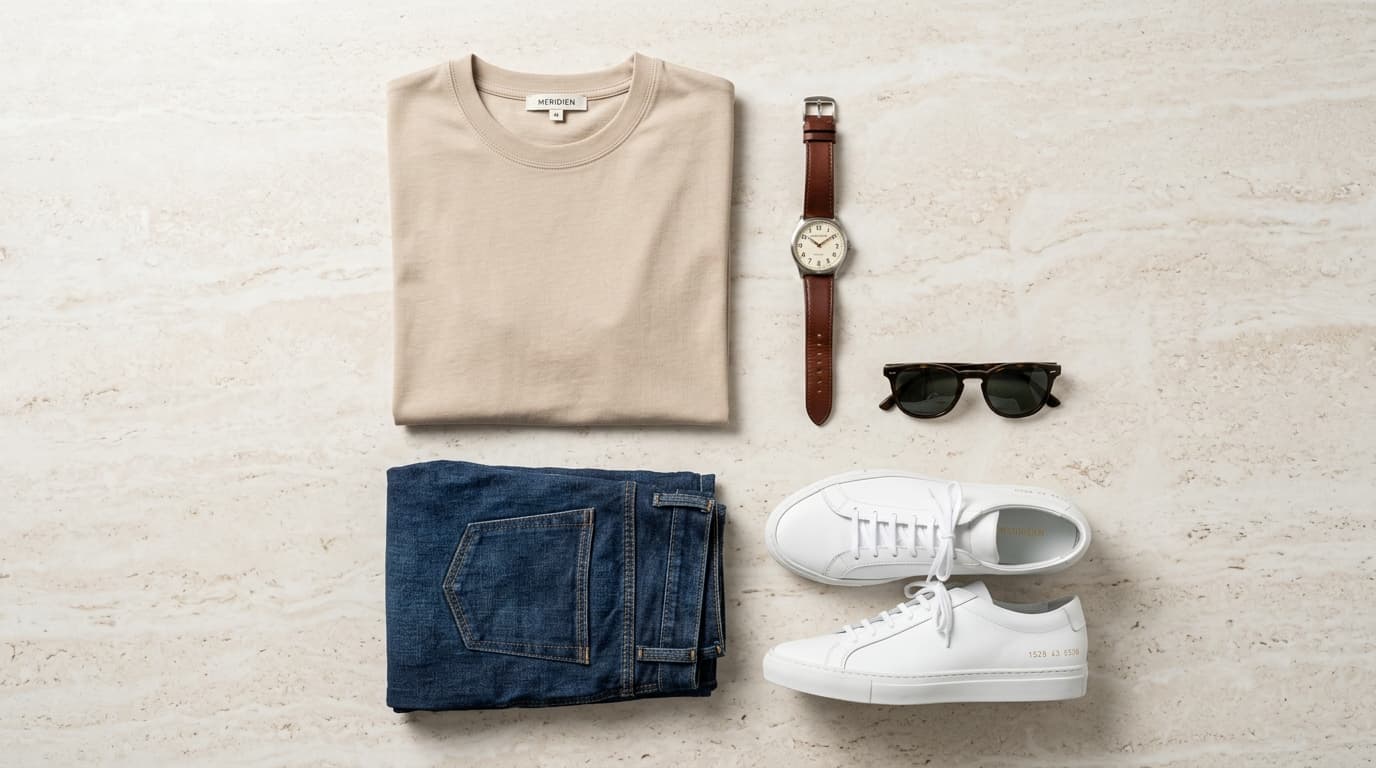
 Flat lay of beige t-shirt, blue jeans, white sneakers and accessories
What is flat lay clothing photography?
Flat lay photography (also known as bird's-eye or tabletop apparel photography) involves arranging clothing items on a horizontal surface and shooting directly from above at a 90-degree angle.
This overhead perspective removes visual distractions, highlights the silhouette and texture of the garment, and creates a uniform look across your entire ecommerce catalog.
For direct-to-consumer apparel brands, independent boutiques, and marketplace sellers, flat lay photography provides several key operational benefits:
- Cost-effective: Eliminates the ongoing costs of model casting calls, hair and makeup artists, and studio rentals.
- Fast and scalable: Allows ecommerce teams to shoot 30 to 50 garments per hour, making it ideal for seasonal drops and large product catalogs.
- Visual consistency: Keeps angles, lighting ratios, and background tones standardized across product listing pages (PLPs).
- Perfect for ecommerce: Displays the complete garment cut, neckline, hems, fabric weight, and key hardware details clearly for shoppers.
When to use flat lay photography
Flat lay photography is versatile and works across multiple digital and print sales channels:
- Ecommerce store catalogs: Primary and secondary product gallery images on Shopify, WooCommerce, BigCommerce, and custom storefronts.
- Online marketplaces: Clean, compliant listing photos for Amazon, Etsy, eBay, ASOS Marketplace, and Poshmark.
- Social media feeds and paid ads: Curated "outfit of the day" (OOTD) styling, grid posts, and carousel ads on Instagram, Pinterest, and TikTok.
- Lookbooks and line sheets: Wholesale presentations, buyer linesheets, and seasonal digital lookbooks.
- Product launches and capsule drops: Quick-turnaround visual packages when samples arrive days before launch.
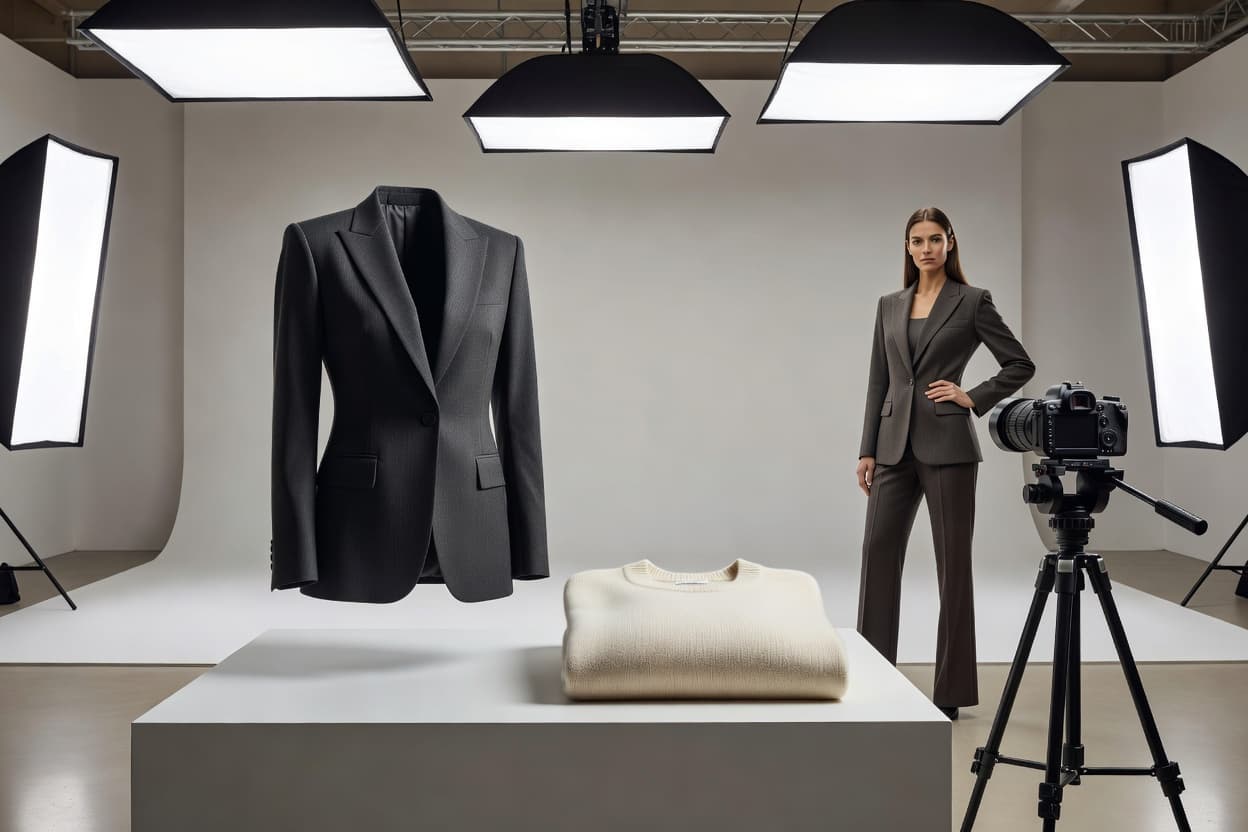
Pro Tip: Flat lay photography works best for garments that naturally lay flat: t-shirts, jeans, trousers, casual button-downs, hoodies, knitwear, activewear, swimwear, and accessories. For items with heavy structure or volume (such as tailored blazers, winter coats, and padded puffer jackets), consider using Ghost Mannequin or on-model photography via Apparel Lifestyle.
What you need for flat lay clothing photography
You do not need a five-figure studio setup to shoot high-quality flat lays. Here is the recommended equipment checklist for professional results:
| Equipment | Recommended Choice | Budget Alternative |
|---|---|---|
| Camera | DSLR or Mirrorless camera (Sony, Canon, Nikon) | Modern flagship smartphone (iPhone, Pixel, Galaxy) |
| Lens | 35mm – 50mm prime lens (to minimize edge distortion) | Built-in 1x / 2x optical camera lens |
| Tripod | Sturdy tripod with a 90-degree horizontal overhead arm | C-stand with boom arm or tabletop mount |
| Lighting | Continuous LED light panels or dual softboxes | Diffused natural window light with white foam board |
| Surface | White foam core, marble slab, wood planks, or linen | Smooth tabletop or roll of seamless background paper |
| Styling Props | Matching shoes, belts, sunglasses, jewelry, magazines | Minimalist color-matched accessories |
| Editing | Adobe Lightroom, Photoshop, or Capture One | Mobile editing apps (VSCO, Lightroom Mobile, Snapseed) |
How to take flat lay clothing photos: step-by-step
Achieving consistent, commercial-grade flat lay photos requires a structured, repeatable shooting process:
1. Prepare your background surface
Choose a clean, flat surface that matches your brand aesthetic. Secure your background paper or tabletop so it does not shift between shots. Ensure the surface is wiped clean of dust, lint, and smudges before placing products.
2. Arrange and style the garment
Place the garment flat on the surface. Use a handheld garment steamer or iron to remove creases and wrinkles. Smooth out seams, align collars, straighten zippers, and tuck in any visible laundry care tags.
Styling tip: Add slight folds or cuffs on sleeves to give the fabric a relaxed, organic feel rather than looking stiff.
3. Add complementary styling and props
If you are creating an outfit bundle or lifestyle flat lay, add 2 to 3 complementary props (such as footwear, eyewear, or a watch). Keep props secondary so they accentuate the hero garment without overwhelming the frame.
4. Align your camera directly overhead
Mount your camera or smartphone onto an overhead arm or tripod. Use a bubble level or your camera's internal electronic level grid to ensure the lens is perfectly parallel (90 degrees) to the surface. Shooting at an angle causes perspective distortion and makes proportions look skewed.
5. Position and soften your lighting
Place your key light at a 45-degree angle to the product, elevated above the surface. Use a large softbox or diffusion sheet to eliminate harsh specular reflections and soften drop shadows. Place a white reflector or foam board on the opposite side to bounce fill light into deep shadows.
6. Shoot tethered and check details
Take test shots and review them on a larger screen rather than the camera viewfinder. Inspect edge sharpness, true-to-life color accuracy, fabric texture rendering, and white balance before proceeding through the rest of the batch.
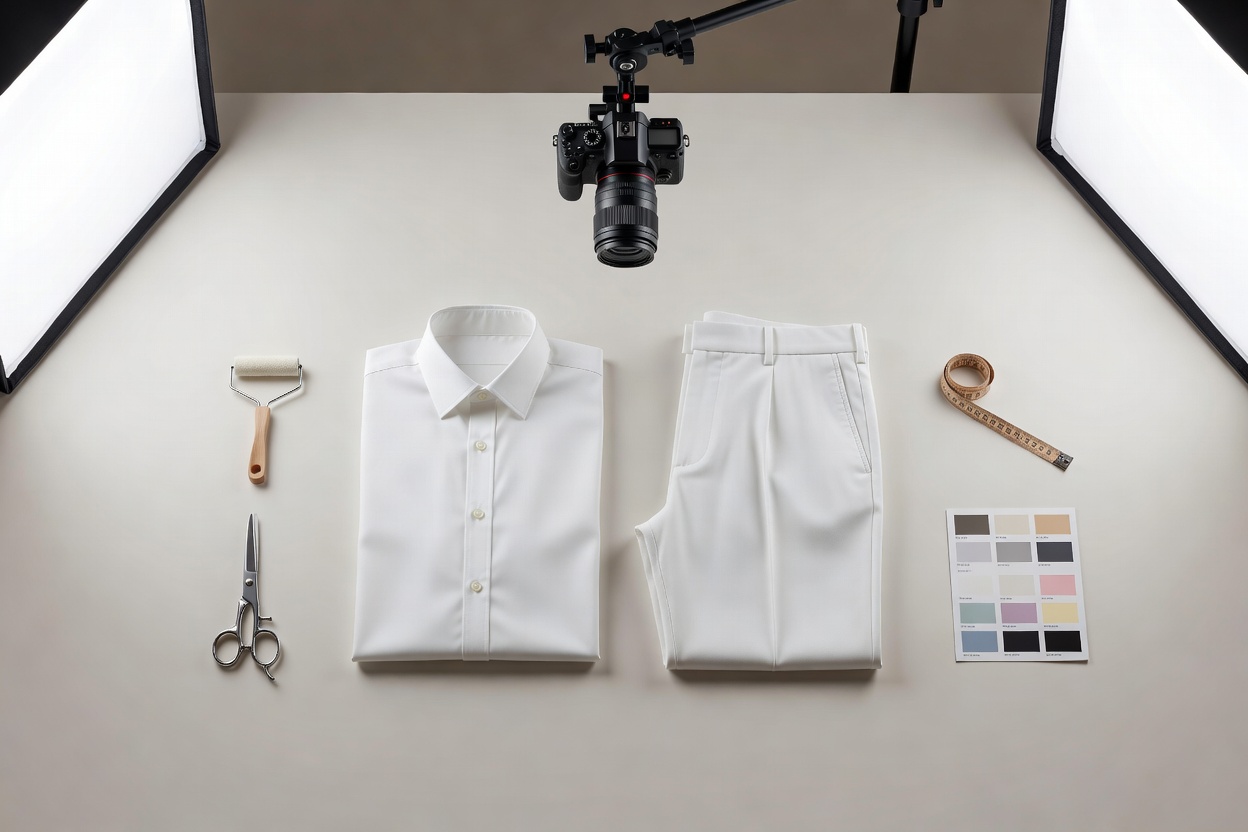
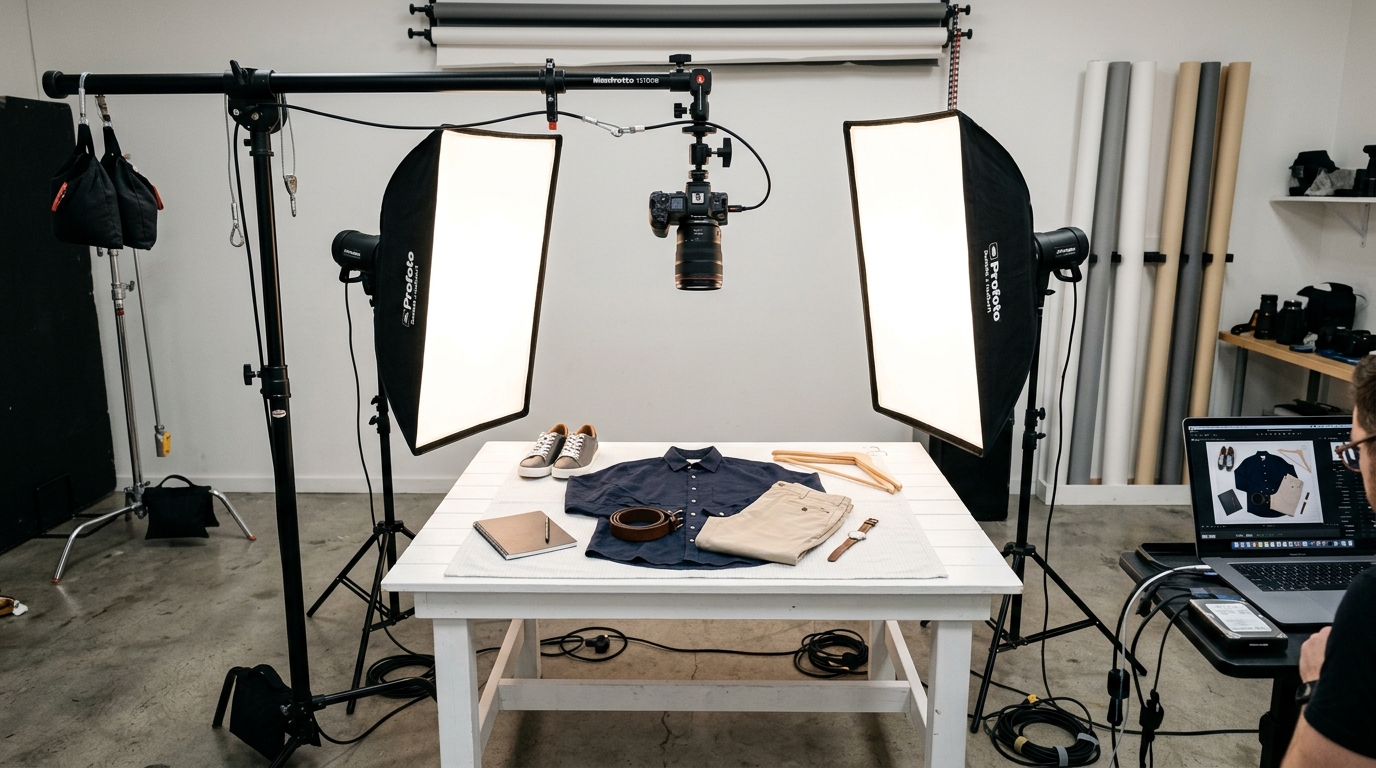 Overhead camera setup for flat lay clothing photography
Best surfaces and backdrops for flat lay photography
Your backdrop surface sets the mood and perceived value of your product:
- Pure White / Light Grey Foam Board: Clean, modern, and compliant with Amazon and Google Shopping guidelines. Best for standard e-commerce product listings.
- White Marble / Travertine: Premium, luxurious, and elegant. Ideal for jewelry, premium silk garments, and upscale designer basics.
- Light Natural Wood: Warm, organic, and rustic. Perfect for denim, streetwear, sustainable fashion, and flannel shirts.
- Polished Concrete / Slate: Industrial, contemporary, and minimalist. Well-suited for athletic apparel, technical outerwear, and urban lifestyle brands.
- Fabric / Washed Linen: Soft, textured, and relaxed. Great for lounge apparel, baby clothing, sleepwear, and organic cotton goods.
Flat lay vs other apparel photography methods
Choosing the right photography method depends on your catalog size, production budget, and product categories:
| Method | Best For | Advantages | Limitations |
|---|---|---|---|
| Flat Lay | Basics, t-shirts, jeans, accessories, PLP grids | Fast, cost-effective, uniform, easy to shoot at scale | Does not display physical fit, stretch, or body movement |
| Ghost Mannequin | Button-ups, structured jackets, tailored dresses | Shows 3D garment shape, clean hollow neckline | Requires multi-shot shooting and manual cutout editing (Ghost Mannequin) |
| On-Model Studio | Fashion lookbooks, hero PDP shots, premium brands | Demonstrates fit, drape, styling, and human emotion | High production costs ($2,500–$7,000/shoot), scheduling bottlenecks |
| AI Virtual Model | Fast scaling across demographics, scenes, and sizes | 120+ AI models, under $1 per render, rapid turnaround | Requires clean flat-lay or mannequin source image (Apparel Studio) |
Flat lay photography tips that make a difference
Small adjustments in styling and camera settings produce noticeable improvements in photo quality:
- Leave breathing room: Keep at least 15% to 20% margin around the edges of the frame to give your garment breathing space and allow flexible cropping for square (1:1) and vertical (4:5) ecommerce formats.
- Use double-sided tape and pins: Place small pieces of styling tape underneath collars, lapels, and pocket flaps to hold them flush against the backdrop.
- Maintain fixed camera distance and focal length: Keep your tripod height and lens focal length locked across the entire photoshoot to ensure all items in a category share identical scale.
- Capture close-up macro details: Alongside the full-garment overhead shot, shoot secondary close-ups of buttons, embroidery, zipper pulls, and fabric weaves to build buyer trust and reduce return rates.
- Edit with restraint: Correct white balance, exposure, and dust spots, but avoid aggressive color grading that alters the true hue of the fabric.
Traditional flat lay vs AI-powered apparel photography
While traditional flat lay photography remains an essential staple of ecommerce visual production, combining your flat lays with AI studio technology unlocks new creative possibilities without additional photoshoot overhead.
Using Shotinger Apparel Studio and Apparel Lifestyle, you can take a single flat lay photo and instantly transform it into:
- On-model studio photoshoots featuring 120+ diverse AI models across different ethnicities, ages, and body builds.
- Real-world lifestyle scenes across urban, editorial, cafe, and outdoor settings.
- Short-form AI video motion for TikTok Shop, Instagram Reels, and interactive product galleries.
Instead of being locked into a single overhead view, one flat lay image becomes the foundation for your brand's complete multichannel visual suite.
Ready to upgrade your apparel visuals?
Create studio-quality on-model and flat lay photos in minutes with Shotinger. Save production time, eliminate shoot logistics, and scale your ecommerce photography.
Try Shotinger Free with 15 Studio Credits →
Start creating campaign-ready product visuals
Transform flat lays, packshots, and jewelry photos into photorealistic on-model imagery in under 60 seconds.